OUR ADVERTISERS

Monday, July 31, 2006

Kids bikes, the smart way.


Ok, many of you out there go out and buy your kid's first bicycle as soon as you think he/she can ride. The asking price for these things new is, I find, too expensive most of the time. Everybody wants what's best for their kids and that's understandable. But the logical way of doing this is buying used.

These bikes are very simple and bicycle repair and maintenance on them is almost nil. They use the same material as the full size ones, except in a smaller format. If your child would remain the same size from 3 to 18 years old, except for the tires, he/she would probably never go through the bike. So why buy a new 12, 16 or even 20 inch wheel bike brand new when you'll probably have to get rid of it within a year or two. Kiddie bikes in those sizes are abundant on the used market at garage sales and thrift stores. I know of some stores that actually give them away because they have too many of them. Never pay more than $20. They are also found by the curb come garbage day as well of course. Those used rides require minimum repair, just make sure the tires are ok, hold air and that the chain is not seized in rust. Use the info on this blog and you should be good.

If your kid is really serious about biking, then you can invest on a ride that will suite is style of riding, may it be road racing, BMX, mountain biking or lowriders. If your child gets seriously involved in any type of cycling, get involved as well and spend some quality time with them.

Tip of the day: Plan rides with your kids, let them choose the itinerary. Let them lead the ride when safely possible. They will get physical activity, learn new things, see new places and so will you. My kids are in there late teens now and we still enjoy riding together frequently with some rides being recalled years later with fondness.

Sunday, July 30, 2006

Big Homebuilt El Cheapo Bicycle Cargo Trailer


First off let's give credit where credit is due. This is not an original idea. It is a modified design from an original post on MAKE that shows you how to build a $30 trailer. Mine came out at $34, not bad.

The main body

I used 4 pieces of 1 X 2 lumber and some left over plywood I had. I built a ladder type frame by using 90 degree brackets and screwed everything in. I then used steel cover plates for electrical boxes for my wheel support braces. Everything was screwed and glued into place.
The trailer arm

I recycled a cheap car bicycle rack that I wasn't using anymore, bent and cut the thing into shape. I got the part I needed and some sweet revenge for all the times that the thing made me scream and yell! The finished arm was bolted tight to the frame and seems pretty solid so far.

The hitch

This is the part that makes every homebuilder sweat! You need something solid and that will allow for all the free movement that bikes are known for. I think my solution is pretty simple and cheap as well. I used one of those electrical cover plates that I folded in half, made a hole and bolted it on to the wheel and frame of my bike. I then bolted an eye bolt on that bracket. I think it's a bit too big, but it does the job well. I put a U-clamp that can be locked in place with a screw that I put in a hole that was drilled in the trailer arm. There is a lot of play and you can feel some jerking motion when you pull the trailer. But hey! That itch cost less then $5 to make, it's strong and allows all the free movement that you need. You will never flip the trailer while doing a crazy slalom maneuver. I've put some electrical tape over the eye bolt to kill the clanking noise that is inevitable with this set-up.

Wheels and hardware

The wheels are a pair of 16 inchers that were lying around my backyard. I need to get some matching tires now. I always build my projects with the strict minimum of new parts. That way if the project fails, I'm not out by too much money. I put in some eye screws to hold the cargo with bungee cords. I might make sides to the thing, but I have to paint it first since it will live outdoors.

In closing

I built this cargo trailer pretty big because I wanted to be able to carry big stuff. I don't do that everyday, but I now have something I can use instead of the family, gas guzzling, money pit mini van. By the way, I don't know how much the trailer weights, but it's lighter than one of those minvan seats. I will be building a smaller version with two plastic containers bolted to the frame for grocery runs. If you decide to build one, do it the size you are most comfortable with. A rule of thumb for the width is not larger than your shoulders, this way you can safely use the trailer on bike paths. I will update this post everytime I make changes to the big el cheapo cargo trailer and I'll make a new one for the smaller trailer.

Safety note

This trailer is designed for cargo only. I do not recommend building one for carrying your kids. A good used one would be a much better solution. When the kids grow out of it, you can still use it to carry groceries, treasures found at garage sales or a complete kit for a picnic with your significant other. However, if you plan to do this anyway, make sure that the kids cannot get their hands in the wheel spokes. Also, test the living daylights out of your contraption before by loading it with twice the weight, ride in the worst possible road conditions and do the craziest stunts. If the thing is still in one piece after that and hasn't tipped over, then you might want to trust the health of your kids in your contraption. I wouldn't.

Update

If you want to build a small grocery getter trailer for your bicycle, check out this artcile on how to build one.

Tip of the day: reuse, repair, recycle and have fun doing it!

Saturday, July 29, 2006

By popular demand: Adjusting Brakes, yes you need those!


The one thing that is more important than the things that make you go on a bike is the one that makes you stop, the brakes. There are many types and I'll try to cover them all in this article.

First things, general knowledge about brakes. Before you go and start fiddling with the brake
cables and adjustment nuts, check if your wheels are bolted straight on the frame or fork. Nothing will freak you out more then busting your head for an hour trying to figure out why the the damn thing can't be adjusted only to find out that the wheel was on crooked. Make sure that all the cable housings are set in properly in the frame holders, the caliper and the brake handle. Make sure your pads are not worn out beyond salvage.Before you set yourself to adjust your brakes, make sure that all adjustement nuts on the caliper and brake handle are screwed all the way in. You might need to unscrew them later for a last minor adjustement. Replace any frayed cable as this is a sign of bad things to come. Buy those little cable ends that you squeeze on the end of the cable or melt some solder on it, it will prevent the cable from poking you and fraying of the cable. Lastly, the front brakes always work better than the rear. It's simple physics, the cable is shorter, less friction, quicker response.

With that said, here are the different types out there:

FIXED GEAR BIKES: No brakes, if you have a bike with a fixed gear riding on a closed track that's not really a problem. If you ride on the streets the only thing that can help you
is your riding ability and a very good mojo. In my opinion, I think you guys are insane and I worship the the pavement you ride on. Be careful and light a candle at church once and awhile.

COASTER OR BACK PEDAL BRAKES: Not much to do here. The one important thing is to make sure that the arm coming out of the hub on the opposite side of the gear is securely bolted
to the frame with a bracket. If not, the brake won't work and the pedal will kick back
up if you try to stop. I will not tell you how to take one apart. I've tried this and it seems that
coaster hubs have a tendency to commit suicide once violated. (For those who question my ability, I can rebuild a Sturmey Archer internal 3 speed hub.). If you ever experience smoke coming out of the hub while braking, you're going down a hill very very fast, you're burning the grease in the hub, you're on the wrong bike for the job and you're praying for dear life!

SIDEPULL CALIPER BRAKES: These are the common brakes on older and cheaper bikes. Bikes that you and me ride. They are not the best but they do the job, most of the time. The worst combination would be a side pull caliper brake trying to stop a wet steel chromed wheel, remember that next time you ride in the rain. You'll need a 10mm open wrench to adjust the cable retaining nut on the caliper(Some calipers used other sized nuts sometimes) and the pads. First, make sure the pads are aligned with the rim and that you have full coverage. The pads should be parallel to the rim. If that's not the case, you can flex the caliper where the pad is to accomplish that. Remember this before you do that, steel bends and aluminium breaks. So make sure your caliper is made of steel before doing that. Now that your pads are square on and aligned with the rim, undo the cable retaining screw on the caliper, squeeze the pads on the rim, pull the cable to remove any slack and re-tighten the retaining nut. These caliper always tend to pull more on one side. To adjust this, play with the nut holding the caliper behind it on the frame or fork. This braking system has a lot of slack already built into it. Unscrew the cable adjustement housing on the caliper or brake handle to stretch the cable until satisfied. One last note on this type. Women's bikes usually have these brakes with the cable upside down on the back. This set up makes for accumulated water in the cable housing and rust forms jamming everything. Just switch the position of the retaining nut and cable holder on the caliper to fix this flaw.

CANTILEVER BRAKES: Those were great when they came out, but now I despise them! Too many parts, you need three hands to adjust them and to much room for dangerous adjustements that can lead to an accident. My best advice for these is to replace them with modern v-type brakes, even the cheap ones work better then any old style cantilever brakes. If you want to make only one upgrade on your bike and you have brake bosses on your frame, buy these. If you absolutely want to keep those, well my sympathies and here's how to adjust them: Same thing as the side pull for the cable adjustement but there exist many retaining nut systems on these. The main problem is the pad adjustment. You'll need an hex key and a 10mm open wrench. Hold the pad with the hex key, unscrew the nut at the opposite end with the wrench and place the pad so that it is square on and parallel to the rim. If you look at your
pads from the front or back of the bike, make sure that they are pointing up and not down at the rim. Down pointing pads will want to go under the rim and that will make for some interesting deccelaration that you do not want to experience. To center the pads with the rim, you may have a small adjustement screw or hex nut at the base. Screw in for the pad to move away from the rim and unscrew it to move closer to the rim. Play with this until you're statisfied. Safety note, if you have old cantilever brakes on the front with a center pull cable, make sure you have something between it and the front tire to prevent an endo if the main cable snaps. A fender is the best thing or a reflector bracket. Now go take a ride to your local bike shop and buy some v-type brakes.

V-BRAKES OR SIDEPULL BRAKES OR ALLELUYA!: Simple, yet powerful. I love these, they are simple to adjust and all of them work great. All except the ones with the pads that have a post instead of a nut to attach to the caliper, like the cantilever brakes, avoid those at all cost. The cable adjustement is the same as the above, the retaining nut is usually an hex screw. First, make sure the pads are square on and parallel to the rim by unscrewing the bolt on the pad, with the hex key in there, push the pad on the rim. Now screw it in and you're done. Unscrew the retaining screw, grab both calipers, squeeze, pull the slack out of the cable and rescrew the retaining screw. You don't have to squeeze the calipers hard, there's not much slack in this braking system. To center the pads on the rim, play with the small adjustement screws at the bottom of the calipers the same as the cantilever brakes. VoilĂ , you're done.

DISC BRAKES: No clue! I haven't had the chance to own or work on these. From what I hear they work great in any situation and of course they won't eat up your rims.

ROD LINKAGE BRAKES: Unfortunately, these are not common brakes here in Canada and I never had the chance to work on these bullet proof brakes.

Tip of the day: Buy a few brake cables ahead of time. They are cheap and it will save you a trip for the next time you need one. Keep one on your bike for emergencies.

Monday, July 24, 2006

From wreck to ride or how not to buy a new bike.


Need a new ride? Before spending your hard earned dollar on a new one, look at the curb or local dump for your next ride. It is amazing on how many bikes are left in the garbage that would only require some small repairs to return to active duty. And the best part, they are free. Even if the one you find requires some replacement parts, chances are you can find another bike in the trash to use for spare parts. No matter how bad a bike is in the trash, there are always some parts on it you can use.

Hence this blog, by knowing how to repair a bicycle, you can free yourself in many ways. Not only from the oil barons, but also by knowing your ride inside and out. Warning! This collecting of bikes in the trash for parts or ride is addictive! My last new bike was bought over 14 years ago and I have owned about 40 since. That's without the ones I have stripped for parts! Keep your eyes open and have fun.

The two rides pictured here were found in the trash. The cruiser is my daily ride and the Chopper was restored by me and sold for $250 after 6 years of enjoyment.

Tip of the day: Check your local municipality for found bike auctions. Treasures to be found there as well.

Wednesday, July 19, 2006

Adjusting your derailleur


One of the main problems that I find on every single bike that comes trough my shop is that the derailleurs are out of adjustement. The derailleur is that thing in the front and back of the chain drive that "derails" the chain into it's proper place. Now, don't bother fidling with the thing as it is, let's start fresh.

FIRST: Unscrew the cables from their attachement on the derailleurs. Bring the shifters back to their dead position, that's when there is no pull on the cable and make sure that all the cable housing adjustement screws on the shifters and/or derailleurs are screwed back in to their original position(more on that later).

SECOND: Now with everything deconnected, turn the pedals and the chain should come to rest in the last position gear on the outside of the wheel and at the first one closest to the frame on the chain ring. That's because the system works by pulling on the devices with the cable. If you are not at the last gear on the wheel and the first one at the chain ring, you have already found a problem. You have two screws on every derailleur, one to adjust the last gear: "H" and one to adjust the first gear "L". This is the same on every derailleur, adjust that screw by going clockwise to move the derailleur in and counterclockwise to move it out. Careful, in the rear one you could end up with the chain in between the wheel and the frame, go slowly.

THIRD: Now that your derailleurs are adjusted properly at their last position gear, reinstall the cable. Make sure there is no slack in the cable. Now turn the pedals and click in the first position for the rear derailleur, it should go into the next available gear. Not doing that? Don't worry, remember that adjustement screw on the cable housing? Now start to unscrew it slowly while turning the pedals. This will strech the cable a little bit at a time. Unscrew it until the chain goes into the next available gear,"click" that's it, you're done. Now shift until you have pulled the cable all the way to first gear. If it goes there, you're good. If not,one of two things have happened. Booboo one is that the chain won't go into first, simply unscrew "L" slowly until it does while keeping tension on the cable with the shifter. Booboo two, the chain is now between the gear and the spokes of the wheel. Carefully remove the chain and set it on the first gear and screw "L" to block the derailleur from going forward.

Sounds a bit complicated, but with some practice you'll be able to do it like a pro. By the way, being a bike mechanic, I like simple things. My bikes have 3 or 5 speeds with regular friction shifters where you have to guess where the gear is going. I love simple.

Tip of the day: Putting new cables in? They will strech after a while and will need to be readjusted. Keep this in mind when buying a new bike and ask the shop if it comes with a free tune up within the first 6 months.

Let me know what you would like to read about. I don't do product review of extreme downhill mountain bikes or the latest suspension forks. You can buy any add clad mountain bike magazine for that. I can answer just about anything else.

Monday, July 17, 2006

The one tool you absolutely need!


You want to impress some babe that is stuck with a broken chain on her bike in the middle of nowhere? You want to avoid walking 20 miles because your chain just broke for no reason? You want a tool that might pay itself and maybe get you that free Ipod? Ok, maybe not that last part about the free Ipod, but the chain breaker tool is the one tool that will pay for itself by either avoiding you a long walk, saving some poor guy stuck with a broken chain who will give you cash for saving the day without your asking or get a phone number from a gorgeous babe that you saved in the same predicament.

Chains break off some times for no apparent reason or when we ask a bit too much of them. I had chains break on me while riding normally in the city and I always had my trusty chain breaker with me. It paid itself a few times over by helping out stranded cyclist on many occasions.

Don't be cheap and buy a decent one. Park Tools makes a good one and it's not expensive. It is pretty easy to use. You put the chain in the tool, align the pin of the tool with the pin of the chain link, screw in and voila! Just make sure you don't push the pin out completely, then you'll be screwed and you'll have to scrap that link and start all over again. Keep the pin and threads of your chain breaker well lubed with, you guessed it, automatic transmission oil. The tool creates a lot of heat with the friction from pushing the pin and that heat damages it. The oil will prevent that and the tool will last forever.

Tip of the day: Just fixed a chain on the bike path and you got filthy hands? Wet your hands with the water of your bottle, put some sand in there, scrub, rinse and you'll have clean hands.

Thursday, July 13, 2006

Fixing a flat orThe flat tire fraud!


Ever go to a bike shop to get a flat fixed and you end up with the same problem a couple of days later? Then you have been the victim of poor workmanship or a mechanic with low work ethics. Not all bike shops are bad, most of them are pretty good, but if you want to fix a flat yourself, it is pretty easy to do. Here's how-to:

First off, remove any remaining air in the tube if there is still some left. Take the tire off the wheel. This can be done by hand, but sometimes the use of tire spoons is necessary. Removing the tire one sidewall at a time is also easier.

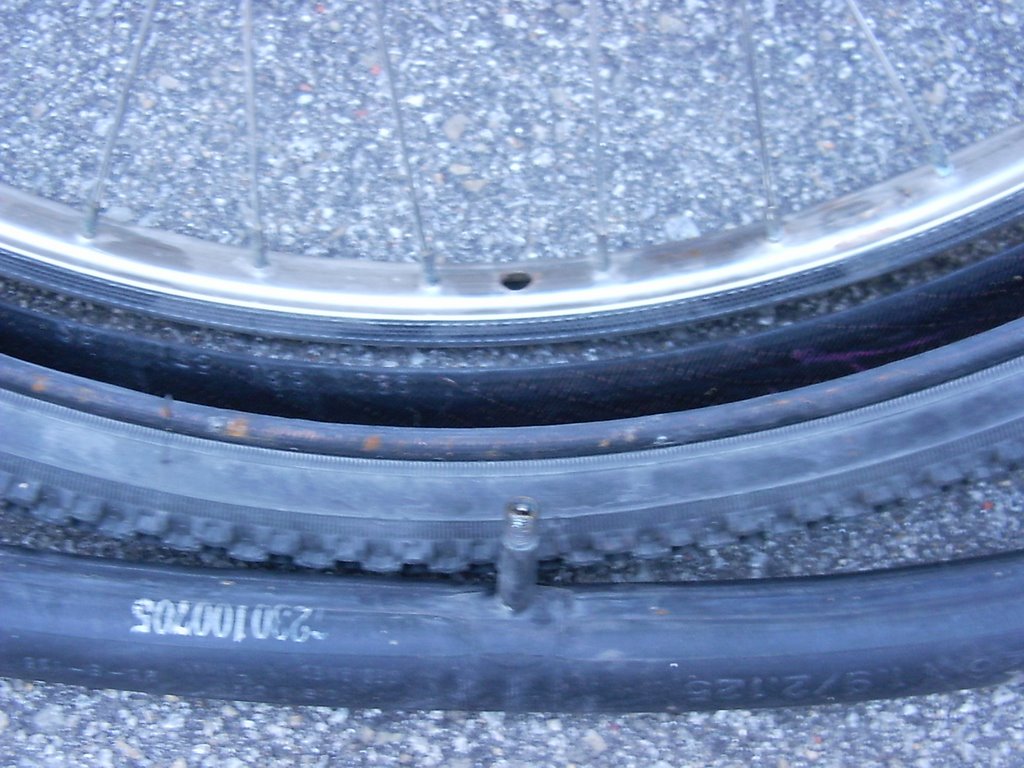
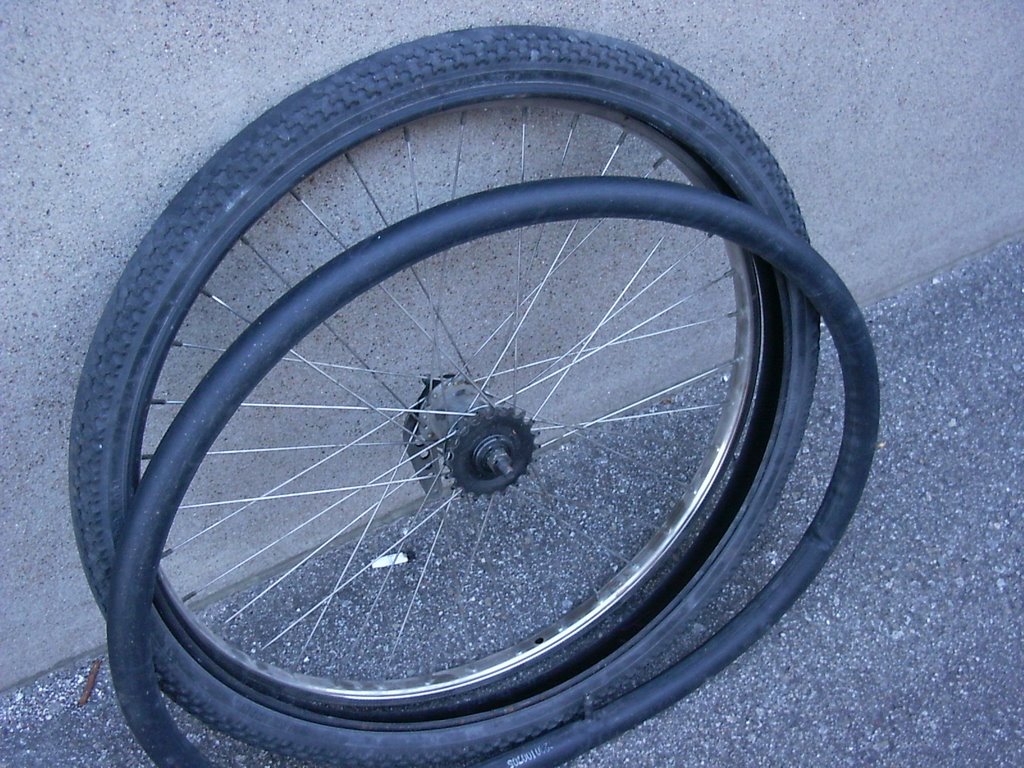
Now, put the wheel up against a wall, put the tire against the wheel at the same place it was on the rim and finally put the tube against the tire at the same place it was in the tire. You can use the valve on the tube and the valve hole on the rim to help you.

You may ask:"but why do all this", because installing a new tube will not tell you WHY you had a flat and you might end up with another puncture. While it is up against the tire, fill the bad tube with air until you hear the air coming out of the hole. Find the hole and look where it is compared to the tire and wheel.

Ok, now it's time for the diagnostic, you'll find a hole somewhere and different types of holes means different things:

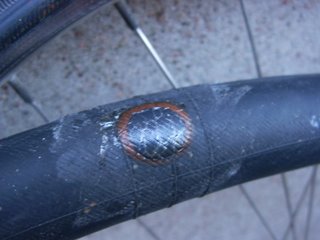
One puncture on the outside radius of the tube means that you rolled on something sharp. To make sure that it's not there anymore, feel the inside of the tire for anything sharp and remove it. Careful now, if it punctured your tube, it will puncture your skin. Also, it is possible that your tire is worn out and needs to be replaced, bald tires are not too strong against a sharp little rock.

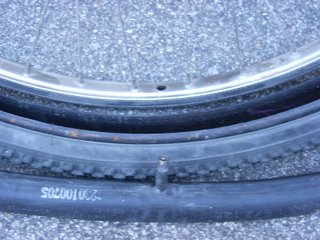
One puncture on the inside of the tube radius means that the rubber tape on the inside of the rim is missing or displaced and a spoke punctured it. See where this happened in relation with the wheel and fix the problem. If the tape is broken, you can use good old duct tape to fix it.

One puncture on the side of the tube. Check your tire sidewall, you may have a busted tire that exposes your tube. Time to change it.

Two punctures side by side in the inside radius of the tube means that you have pinched it while riding. This happens when the tire is not inflated enough and you hit a major bump or hole. This pinchs the tube against the rim and PAF! Read the maximum pressure allowed on the tire and inflate within 5 to 10 psi of the posted limit.(I had this happen to me while bombing down a rocky trail, not fun.)

Star shaped puncture anywhere on the tube. That's over inflation and your tube has blown up. If you were fortunate enough to be there when it happens, it makes a pretty cool loud BANG! If you were unfortunate enough to be there when it happened and you were actually riding, chances are you are reading this from a hospital bed and it wasn't cool. Always inflate within 5 to 10 psi of the posted limit on the tire. You need to leave room for climate changes and heat from the rim when applying the brakes. This is important when riding in hot weather.

So now you have figured out what caused the flat and your ready to patch it up and go.....NOT! Buy a new tube and install it. A patched up tube is trouble waiting to happen at the least desired moment. Patch up your old tube and check that it is well patched but keep it as a spare on your bike. It will bring you home if you get stuck.

Put the new tube in the tire after inflating it just barely so it has shape. This will make it easier to put in the tire. If you have put too much and this prevents an easy re-entry, simply remove the excess air. Put the tire back on. Depending on many factors, this could be easy or simple. If you cannot do it by hand, you will need tire spoons to work the tire back on the rim. Just be careful not to pinch the tube while using those.

Once your tire is back on the rim, put the wheel on its side, on the ground and put in about 10 psi in it. Stop to check if the tire is properly seated all around the rim on both sides. I failed to do this once and as I was about to release the air after noticing a huge tube balloon on a 26 inch wheel....BOOM! My wife came running into the garage thinking I was shot with a 12 gauge! My ears rang for an hour! Ok, enough with my war stories, now that the tire is evenly set all around the rim, on both sides, pump it to the proper pressure and reinstall the wheel. Make sure that the wheel is seated properly in the frame or fork that all the bolts are tightened before leaving on your next ride.

Tip of the day: If you ever notice a slash in the sidewall of the tire before it blows and you still have a good distance to go, use a folded dollar bill and shove it between the tube and the inside of the tire. Reinflate and you should be good to go.

Good luck and ride safe.