OUR ADVERTISERS

Wednesday, September 16, 2015

Chopper build progress and new name, "Ebola" or part 3

The bike being stripped down, I cleaned the frame and went over it with sandpaper and steel wool. Not a real proper preparation for the red primer finish but i want the paint to flake in time. See I'll be promoting rust, not prevent it.

Frame painted primer red, not the rustproof kind.


I've also used bailing wire to kinda add strength to my bad bolt-on job on the upper part of the frame and to give more rigidity to the brake brace at the rear. We'll see how that goes.

Redneck re-enforced frame and brake bracket. Will it hold or help?


I came up with a new name, "Ebola". The end goal for the bike is for it to look so bad that no one will dare sit on it because they'll be afraid to catch something. Tetanus having been already used, I needed something else and nastier. Can't beat my choice. The theme of the bike will evolve around the name as well.

Homemade stencil on card stock with my printer using Gimp. I outlined the yellow with a permanent marker.


I've started doing a bit of weathering on the red primer finish and I have the fenders sitting outside in the elements. Progress is slow but I want this to come out looking good and balanced. No rush here, I just want to have something really cool and different.

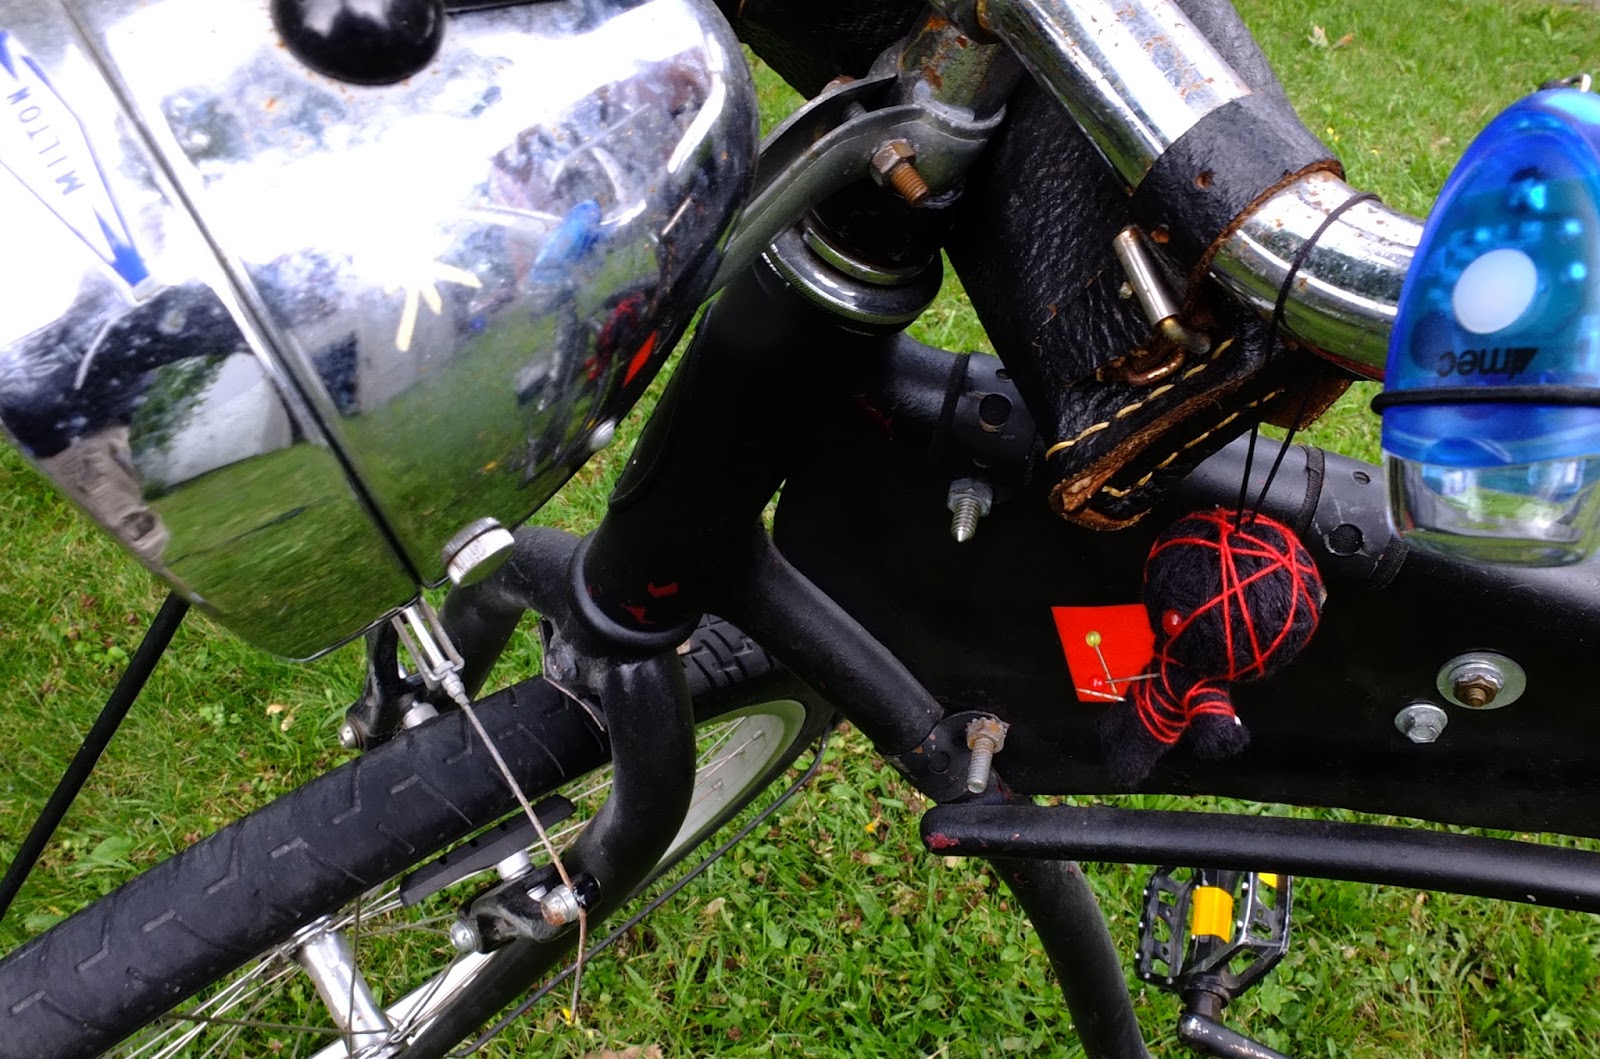
Hiding the bolt-on with a themed bandage on white hockey tape. I did not use real blood, this is food colouring.

Weathering done with Gray and rust model oil paint using a lot of thinner.


Keep posted for more progress. Sadly, my chaintool is still MIA.  :(

Ride safe and Godspeed.

Gerry  :)

Monday, August 31, 2015

No weld Chopper rebuild part 2

So the bike has been taken apart and inspected. Recent documents that came back to light revealed that the mileage made is actually 300 miles. Taking it apart revealed some good and some bad. Grease and bearings stood up good and removing some tape reminded me that I did a stupid move with the hacksaw when I built this thing. However, everything has held up pretty good.

Make no mistake, I wouldn't sell this bike to anyone as it is at best a slapped together piece of junk. But it rides very smoothly and I love it, which in this case comes second to my health and safety.

Talking about slapped together, the paint was just sprayed on after a very light wipe down using a half dirty rag. Want to know what happens when you don't prep your surface properly? Take a look at the picture and the answer is pretty obvious.

So step one is done. The bike is pieces, I gathered some parts, found my tools, well most of them, have a design in mind and the weather is nice, because I'm outdoors you know so that is important. Next will be painting primer red so that I can start building on a , temporarily, clean canvas.


Taking it apart

Grease and bearings fared well.

Oups! A case of measure, cut once...measure again, cut twice.
Paint chips all over the frame shows the very low degree of surface prep. The new paint job won't be much better.  :)

My chaintool is still missing in action.
Some of the parts I'll be using, or not.

Definitely going for a full wrap rear fender.


Until next time, ride safe and Godspeed.

Gerry  :)

Monday, August 24, 2015

New/Old project a Bike Revival

Yesterday I took a stretched chopper I slapped together 4 years ago and fell in love with it all over again. I built it out of 2 frames I had lying around, a Schwinn cruiser and a mixte frame. I stole the idea from a friend who did this design by bringing 2 frames together at the bottom bracket.

I went ahead with my own idea to stretch it even more. I wanted cool looks and a comfortable riding bike. I wanted my cake and eat it too! Well after 4 years, 150 miles and one crash, proof of concept as been overly tested. It's comfortable and reliable like a tank. Now I need to go beyond the semi-gloss black paint and add some character to this thing.

The main goal is to make it look so rough that you would want a Tetanus shot before riding it but the mechanics of it underneath will be perfect and well balanced. This build will be in 2 parts.

First I want to do a full mechanical tune up to all the components and take care of the overall finish. I would like the bike to be in riding condition before the end of the Fall season. Secondly, since I am getting a bit older, I want to install an electric assist system to it that I have lying around. I'll also be adding a full lighting system and make some other cool doodads.

Keep posted for another instalment of this revival next week. Here's some shots of the bike as it sits right now.


The bike as it looks right now
Custom made tire front fender, might be keeping that.

Details of the bolt on Bottom Bracket extension

Shifter with knob found on the ground by my Wife in South Portland Maine, go figure! definitely keeping that.

Foot operated rear brake because I ran out of brake cable. Keeping it but must improve. Doesn't work that good.

Lighting system will be fully redone.

Lunch box saddle bag. To be replaced. This is the sole survivor from the original pair. The other one was destroyed in a crash. Never lock up the front wheel when turning.  :)

Until next time, ride safe and Godspeed.

Gerry  :)

Thursday, July 10, 2014

A return to cycling in your 50's or tips for getting back on the saddle.


Time spent away from this blog is equal to time spent away from cycling. My new found passion for photography makes me walk a lot and brings me to use public transport more than pedalling my way around the city. I still managed to put in 4 good rides a year but weather and a back injury has kept me away from more than a year...until today.

I always ride back home on my first day of vacation. It gives me an opportunity to unwind and gets the work bugs out of my mind. Today's ride was an eye opener after such a long time off the pedals and getting close to the big 50. I got a rude reminder from my muscles that they had been idle for too long and the message was delivered by an insane amount of lactic acid in them. That one ride brought a bunch of things to the surface and hopefully these tips can help a few of you out there who are considering getting back in the saddle for a ride.

1.  Prepare.

Get your stuff together ahead of time. Don't wait at the last minute, your ageing mind will forget where you left that thing when you last used it years ago. Do a serious once over mechanical verification on your bike. The longer it's been parked the worst it can get. Even if it was pristine the last time you used it, time can still take its toll especially if it wasn't stored properly.

2. Plan your route and time table.

Try to avoid busy roads and look for low traffic alternatives. You don't forget how to ride a bike but the hazards of the road are many and you want to give yourself some room. You also want to give yourself some room time wise. Plan for more time than you think you might need to get to your destination. This way, you'll avoid pushing yourself too hard for nothing and you'll have wiggle room in case something unexpected happens.

3. Be aware and anticipate.

It's easy to get lost in the pain or the exhilaration of flying downhill. Keep your eyes open and anticipate all those things that can hurt or kill you like opening car doors, volcano crater sized potholes, loose gravel and texting idiots behind the wheel. Always ride as if you were invisible, not invincible. Wear a helmet, the older we get the more we hurt.

4. Don't ride hard

Get a feel for your bike before you start leaning hard into turns or zig zag between cars. Your reflexes might be a bit slower and your muscle memory might be a bit faded as well. Slowly get back in your old groove to avoid crashing.

5. Have a plan "B"

In case of a mechanical failure or your body decides to give up on you because it thought you were just joking, have a contingency plan to get you back home. Money for a cab or asking a loved one for a lift for the price of a "I told you so." and a slightly bruised ego is a lot better than walking.

Cycling is very good for us even when done with moderate effort. You don't have to start long distances right away, a bit every so often is very good and you'll just go further with time as your endurance improves. I'll be doing at least an hour a week from now on. I swear!

For those wondering, I did make it.

Until next time, Godspeed and ride safe.

Gerry :)

Thursday, February 20, 2014

Top 5 iPhone apps for cyclists

Top 5 iPhone apps for cyclists
Due to modern technological advances, there are now numerous varieties of apps available to aid and entertain you for any aspect of your day to day life. If you are an avid cyclist there are a wealth of apps to help you optimise your riding performance, track your progress, find optimal destinations and even communicate with fellow cyclists. Listed below are five of these ingenious apps which promise to intrigue and inform you whilst you travel.
1-Cycle Tracker Pro ($4.99)
Cycle Tracker Pro provides you with precise data regarding every element of your journey. It notifies you of your speed, distance, altitude, time as well as the amount of calories you have burned. It displays this information on an easy to use interface which also enables you to play music from your iPod whilst you cycle, permitting you to set certain tracks for specific sections of your route, to boost your motivation when you need it the most! You can also keep in contact with your friends and other cyclists through Facebook and Twitter.


2-Bike Doctor 2 ($4.99)
Available for both iPhone and Android, Bike Doctor 2 is a vital lifeline for any cyclist because it provides you with a list of the twenty nine most common bike repairs to help you in the case of any incident. The app provides easy to follow, step-by-step guides to show you how to fix a myriad of issues, from mending punctures to stopping gears from skipping. Moreover, the app contains a safety check option so you can be confident your bike is fully operational before commencing any ride.


3-Bike Hub ($0)
This free app informs you of the best cycling routes in your area. Bike Hub permits you to choose the ride which suits you best; be it a quiet route, a hectic one, or a combination of the two. Furthermore, Bike Hub lists all the local bike shops and garages in your area so you can easily stock up on supplies.


4-EveryTrail ($3.90)
You'll never get lost again! This app enables you to view your current position and cycling route on a Google Map or satellite view. Utilising GPS, EveryTrail integrates your saved rides onto your account on their website as well as allowing you to download 'Open Street Maps' to your phone, simultaneously conserving battery life and helping you find your chosen destination with ease. Additionally, you have the opportunity to test drive this app for free, testing up to a maximum of three rides, before upgrading to the advanced version.


5-Rendezvous
Rendezvous is the perfect app if you enjoy group cycling rides. The app permits you to organise group rides by creating an event and inviting people to join. Subsequently, you can post messages between riders to finalise ride details and discuss possible routes. Moreover, during the actual ride, you can track the locations of your other group members, ensuring no-one is lost or left behind!


These apps are certain to enrich your riding experience and add a hint of modern technology to the timeless classic hobby of cycling. There are even bicycles available from Jardine Motors which you can connect your smartphone to and have a phone holder so you can easily use your apps on the move. The bicycle will even charge your phone as you cycle along! Whether you cycle out with your friends and all the latest technology or alone on a classic bike, have a great ride.
Author
This article was written by Bradley Taylor, a freelance writer from Derby, England. Bradley is a motoring enthusiast who loves writing about cars and everything automotive, but he is versatile and also writes across a variety of other topics. You can keep connected with Bradley on Google+ and follow him on Twitter.


Hope you enjoyed this article by our very first guest writer Bradley Taylor.
Gerry  :)

Monday, September 09, 2013

This blog is on hiatus but it's not dead!


I know some of you  have been screaming for more how-to articles but I can't write what I'm not experiencing. When I started this blog I already had 15 years of messing around with tools and bikes under my belt and it was easy to throw all of it in the blog. Now, things are different.

I haven't been cycling that much lately and whenever I do, it's nothing to write home or on the blog about. My new passion is photography and when i get into something, I go all in. I've yet to master this new skill and it's taking all of what time I have available. I tried to mix cycling and photography with the folder build but as you all know so well, it went nowhere. Not to say that I won't get back to it at some point but don't hold your breathe.

Until I get bitten by the bike bug again, I will still answer your emails, respond to your comments and keep the spammers out. The free Ebook and articles are still there for you to consult. I even catch myself fixing them up sometimes, so enjoy and use them.

Until next time, ride safe and free.

Gerry :)

Monday, June 10, 2013

Cycling and Law Enforcement

Recently here in Montreal Police Officers have been handing out tickets to cyclist for various infractions. Some are saying that they are being more aggressive on enforcement than before.

Man gets a ticket for riding in a pedestrian zone.
Tickets issued vary from crossing on a pedestrian light, riding on the sidewalk and having no or missing reflectors on the bike. Reports coming in from some riders indicate that some Officers are not being discerning in their Law enforcement and going heavy on the pen. One noted anecdote states 3 tickets were issued for 3 missing reflectors on the same bike instead of just one ticket for the general infraction. It is also good to know that Montreal PD does not issue any kind of warnings. If the pen comes out, it will cost you.

What to do then? One thing for sure is to pay attention to your surroundings, making sure you don't commit an infraction right in front of a cop. Check your bike for missing reflectors and replace them according to your local law. Here in Quebec reflectors are required as follows: One white in the front, one red in the back, yellow on the pedals front and back, yellow in the front spokes and red in the rear spokes. Quebec's highway code does not specify a definition for a reflector or a standard size, so if you cannot fit a standard reflector somewhere on your bike, you can use reflective tape of the required color.

One element that has been prompted by all that recent MPD activity towards cyclists here in Montreal is a Facebook Group that lets riders know where the fuzz is at during the day. Same kind of thing already done by our car driving counterparts. Don't have one in your area? Start one, it's not illegal (Here anyways).

Lastly, if you do get pulled over for something by a Police officer, identify yourself and shut up. Keep your arguments for court, anything you say will be used against you in the report. Send in your "not guilty" plea with the section for explanation blank if you choose to challenge the case. Would you show your hand at a poker game?

Keep safe and ride free.

Gerry :)

Saturday, June 01, 2013

Big Bike Ride, epilogue

For those curious on how the big ride went, here's a little post to satisfy your curiosity.


Mechanically the bike did good except for developing a tendency to throw its chain at the end and no it didn't rain. That fender did pay off!  :)


My body aches all over today, especially my butt. The price to pay for not having done any serious riding in the past year.


Hopefully I'll be more on the bike this year.

The Tour rides always finish with a big party. This was the scene at the Olympic Stadium.

Until next time, ride safe and free.

Gerry :)

Friday, May 31, 2013

Preparing for a big ride

I'm scheduled to do the "Tour la Nuit" here in Montreal this evening. My bike and I haven't participated in anything serious, ride-wise  in over a year. This being a night ride with thousands of other cyclists, it is quite important to have proper lighting installed and for it to be fully functional.

Getting the tools out.

My lighting gear was starting to show its age, so I decided to fork the bucks for some new front and back lights. A trip to MEC provided the required equipment for less than $20 and the ride to and from the store gave me a chance to gauge myself and my bike. Not bad but the bike needed some tweaking.

Small but very effective white LED light. This sub $10 will give you proper lighting for an entire season on one battery. 

Very bright $8 rear LED light. I always set mine to blink in order to be more visible.
Installed the lights, checked and adjusted the brakes, checked tire pressure and prepared a tool kit. Tool kits should contain whatever you feel is necessary to keep Murphy at bay. The number of tools and the distance you are willing to walk home are relative to themselves.

My personal selection for the evening.
Talking about Murphy's Law, we might have a chance of rain tonight so I decided to install a rear fender. It probably won't rain now but I can guaranty you that it would have should I have decided to lazily avoid putting one on. 30 minutes well spent.

Always do a test ride prior to the big one.
If you're in Montreal, hope to see you there. If not, until next time ride safe and free.

Gerry :)


Thursday, May 30, 2013

The Ultimate anti-theft bike set up!

These 2 shots were taken near the Montreal Mont-Royal Metro station which is notorious for bike theft. Montreal has a serious bike theft problem and not much is being done by the authorities.

Now this is a BIG lock!
At first I suspected it was a sculpture from a local artist and it turns out I was half right. The whole thing was put together in order to promote the City's Bixi bike program. The successful program has already been exported to other cities like New-York with it's unique design. Most of the parts being unique to this bike and not really worth stealing.

You just need to remember which key goes where...
However, I'm certain some bike thief out there would be crazy enough to take the challenge just for bragging rights!

Until next time, ride safe and free.

Gerry :)

Sunday, May 19, 2013

CCM folder bike conversion to multi-speed

Sorry for skipping a week. The weather was bad (I'm outdoors you know.) and life was pretty busy. Didn't want to make a half ass post.
Beer can light Aluminium cranks or boat anchor heavy steel one piece crank? I think the choice is pretty obvious!

Step one in the build is to convert this once single speed bike to a multi-speed set-up. The first thing I wanted to do was to change the one piece crank to a 3 piece crank using a conversion kit. I got the kit from Pork Chop BMX some time ago for another project that never saw the light of day. The idea is to have a better selection of cranks and to shave off some weight.

Conversion axle and bearings with the dirty original CCM bearing cups.
The kit is pretty straight forward with an axle, bearings, cones and bearing cups. Simply install and put on your favourite crank arms. In my case I did hit a small snag where the bearing cups are a specific size to the CCM. I had to forgo the ones that came with the kit that are sized for conventional American BMXs.

Clean up must also involve the bottom bracket shell, loose dirt will get in the bearings. Here it also reveals the original mid 70's purple color of the bike.
The new bearings did fit in the older cups with no problem. Of course a clean up was in order and they were still in decent shape. I would suggest inspecting them has there is usually one side that is more used up than the other. depending on the rider being left handed or right handed, one side will see more usage than the other. Always put the better cup on the side that suits you, that way they will last a bit longer. In my case as a right handed guy, the better one went on the right side.
Cup and bearings packed with fresh grease. Don't forget to add a dab on the bearing cones as well on the axle. More is always better than not enough.
Completed conversion.
After the bottom bracket was installed, I put on the crank arms and lucky for me, they cleared, barely. I've faced such a situation before and let's just say that the solution wasn't pretty for the frame!

Check for clearance between the crank arm and frame. Also, check your picture for proper focus before publishing!  Aaaaaaargh :X   Notice also that tire clearance is not an issue.
Next I had to install the rear wheel and check for clearance in regards to the tire and frame. That's where I hit another little snag. The axle was a lot wider than what the frame would allow. I remedied the situation by spreading the frame a bit using a car jack.

Small discrepancy here!
Take note that you should never do what I did. Bending a frame is a last resort because you will ruin it or make it dangerously weak. I'm rolling the dice here doing this and only sharing it with you for information purposes. Yes, I'm an idiot, haters don't need to post it in the comments.

Do not ever do this, ever!

Final result.
I finished up by installing the derailleur and the chain. Everything works fine and nothing is rubbing the wrong way. I'm not planning for a front derailleur since the frame design won't allow it. No biggie, I have hands.  :)

This is how it sits for now.
In case you have any questions about the different steps taken in this post, here's a list of links to post I've done in the past that relates to the work done here today:

One piece crank
3 piece crank
Installing a chain

And of course the links to all the how-to articles here.

Until next week, ride safe and free.

Gerry  :)