The one thing that is more important than the things that make you go on a bike is the one that makes you stop, the brakes. There are many types and I'll try to cover them all in this article.
First things, general knowledge about brakes. Before you go and start fiddling with the brake
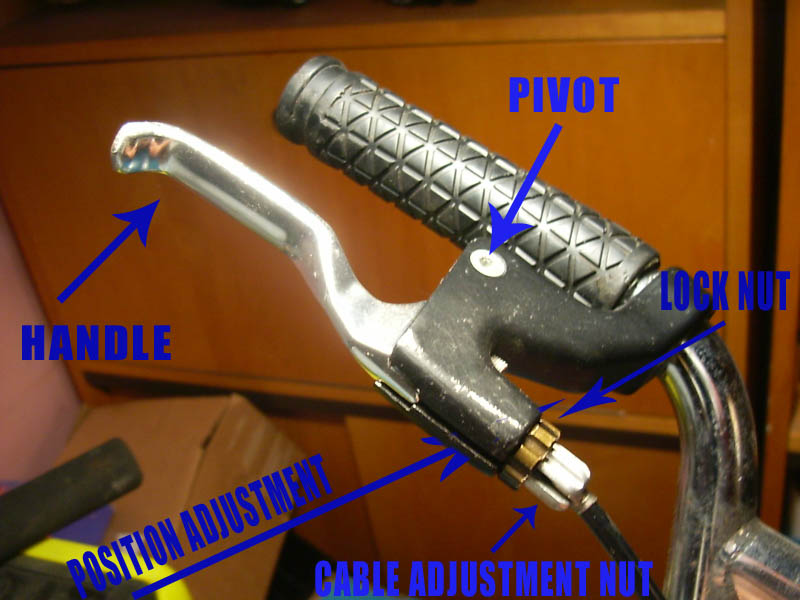
cables and adjustment nuts, check if your wheels are bolted straight on the frame or fork. Nothing will freak you out more then busting your head for an hour trying to figure out why the the damn thing can't be adjusted only to find out that the wheel was on crooked. Make sure that all the cable housings are set in properly in the frame holders, the caliper and the brake handle. Make sure your pads are not worn out beyond salvage.Before you set yourself to adjust your brakes, make sure that all adjustement nuts on the caliper and brake handle are screwed all the way in. You might need to unscrew them later for a last minor adjustement. Replace any frayed cable as this is a sign of bad things to come. Buy those little cable ends that you squeeze on the end of the cable or melt some solder on it, it will prevent the cable from poking you and fraying of the cable. Lastly, the front brakes always work better than the rear. It's simple physics, the cable is shorter, less friction, quicker response.
With that said, here are the different types out there:
FIXED GEAR BIKES: No brakes, if you have a bike with a fixed gear riding on a closed track that's not really a problem. If you ride on the streets the only thing that can help you
is your riding ability and a very good mojo. In my opinion, I think you guys are insane and I worship the the pavement you ride on. Be careful and light a candle at church once and awhile.
COASTER OR BACK PEDAL BRAKES: Not much to do here. The one important thing is to make sure that the arm coming out of the hub on the opposite side of the gear is securely bolted
to the frame with a bracket. If not, the brake won't work and the pedal will kick back
up if you try to stop. I will not tell you how to take one apart. I've tried this and it seems that
coaster hubs have a tendency to commit suicide once violated. (For those who question my ability, I can rebuild a Sturmey Archer internal 3 speed hub.). If you ever experience smoke coming out of the hub while braking, you're going down a hill very very fast, you're burning the grease in the hub, you're on the wrong bike for the job and you're praying for dear life!
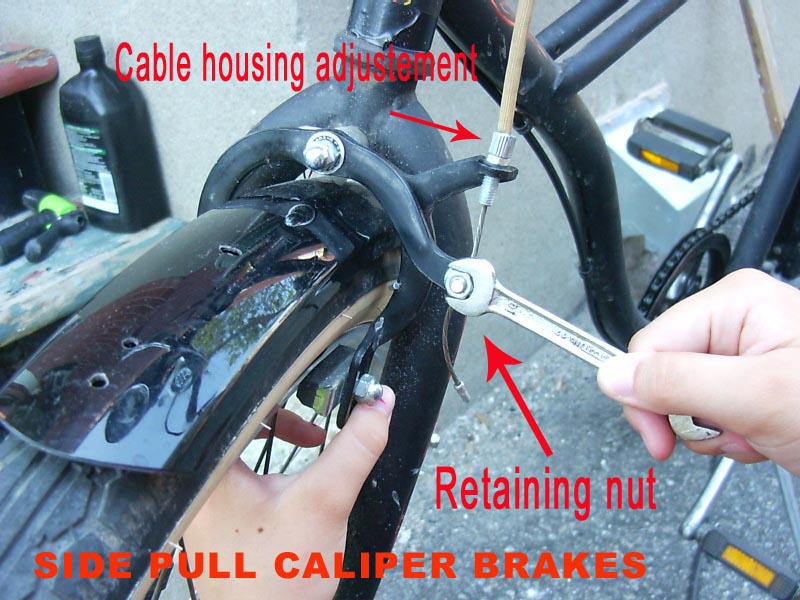
SIDEPULL CALIPER BRAKES: These are the common brakes on older and cheaper bikes. Bikes that you and me ride. They are not the best but they do the job, most of the time. The worst combination would be a side pull caliper brake trying to stop a wet steel chromed wheel, remember that next time you ride in the rain. You'll need a 10mm open wrench to adjust the cable retaining nut on the caliper(Some calipers used other sized nuts sometimes) and the pads. First, make sure the pads are aligned with the rim and that you have full coverage. The pads should be parallel to the rim. If that's not the case, you can flex the caliper where the pad is to accomplish that. Remember this before you do that, steel bends and aluminium breaks. So make sure your caliper is made of steel before doing that. Now that your pads are square on and aligned with the rim, undo the cable retaining screw on the caliper, squeeze the pads on the rim, pull the cable to remove any slack and re-tighten the retaining nut. These caliper always tend to pull more on one side. To adjust this, play with the nut holding the caliper behind it on the frame or fork. This braking system has a lot of slack already built into it. Unscrew the cable adjustement housing on the caliper or brake handle to stretch the cable until satisfied. One last note on this type. Women's bikes usually have these brakes with the cable upside down on the back. This set up makes for accumulated water in the cable housing and rust forms jamming everything. Just switch the position of the retaining nut and cable holder on the caliper to fix this flaw.
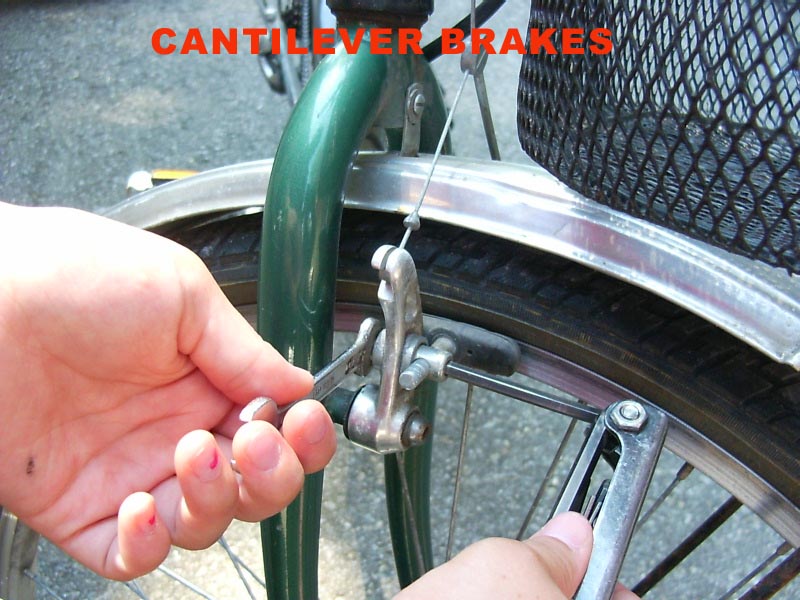
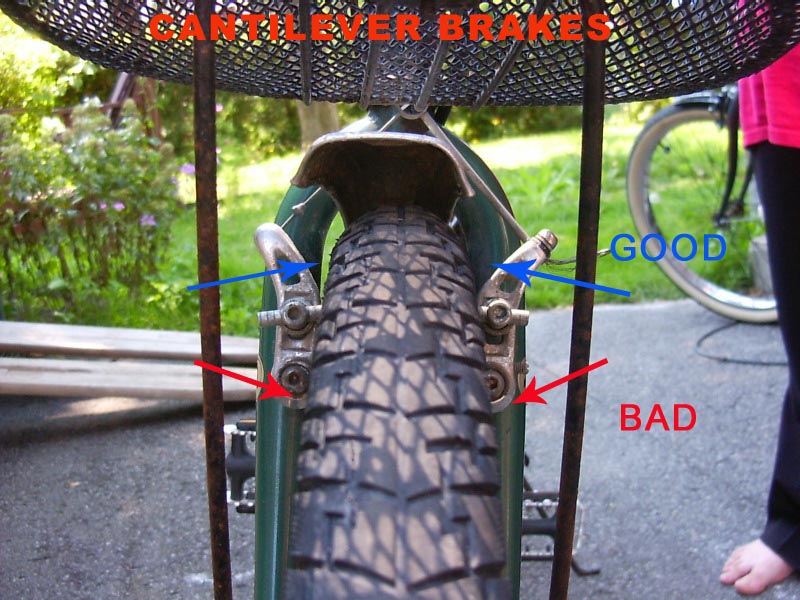
CANTILEVER BRAKES: Those were great when they came out, but now I despise them! Too many parts, you need three hands to adjust them and to much room for dangerous adjustements that can lead to an accident. My best advice for these is to replace them with modern v-type brakes, even the cheap ones work better then any old style cantilever brakes. If you want to make only one upgrade on your bike and you have brake bosses on your frame, buy these. If you absolutely want to keep those, well my sympathies and here's how to adjust them: Same thing as the side pull for the cable adjustement but there exist many retaining nut systems on these. The main problem is the pad adjustment. You'll need an hex key and a 10mm open wrench. Hold the pad with the hex key, unscrew the nut at the opposite end with the wrench and place the pad so that it is square on and parallel to the rim. If you look at your
pads from the front or back of the bike, make sure that they are pointing up and not down at the rim. Down pointing pads will want to go under the rim and that will make for some interesting deccelaration that you do not want to experience. To center the pads with the rim, you may have a small adjustement screw or hex nut at the base. Screw in for the pad to move away from the rim and unscrew it to move closer to the rim. Play with this until you're statisfied. Safety note, if you have old cantilever brakes on the front with a center pull cable, make sure you have something between it and the front tire to prevent an endo if the main cable snaps. A fender is the best thing or a reflector bracket. Now go take a ride to your local bike shop and buy some v-type brakes.
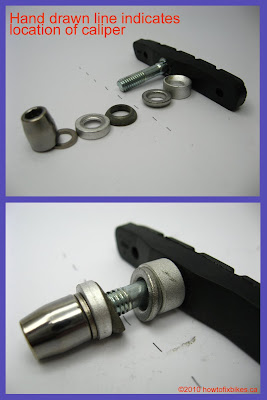
V-BRAKES OR SIDEPULL BRAKES OR ALLELUYA!: Simple, yet powerful. I love these, they are simple to adjust and all of them work great. All except the ones with the pads that have a post instead of a nut to attach to the caliper, like the cantilever brakes, avoid those at all cost. The cable adjustement is the same as the above, the retaining nut is usually an hex screw. First, make sure the pads are square on and parallel to the rim by unscrewing the bolt on the pad, with the hex key in there, push the pad on the rim. Now screw it in and you're done. Unscrew the retaining screw, grab both calipers, squeeze, pull the slack out of the cable and rescrew the retaining screw. You don't have to squeeze the calipers hard, there's not much slack in this braking system. To center the pads on the rim, play with the small adjustement screws at the bottom of the calipers the same as the cantilever brakes. Voilà, you're done.
DISC BRAKES: No clue! I haven't had the chance to own or work on these. From what I hear they work great in any situation and of course they won't eat up your rims.
ROD LINKAGE BRAKES: Unfortunately, these are not common brakes here in Canada and I never had the chance to work on these bullet proof brakes.
Tip of the day: Buy a few brake cables ahead of time. They are cheap and it will save you a trip for the next time you need one. Keep one on your bike for emergencies.