OUR ADVERTISERS

Saturday, September 15, 2007

RAT ROD BIKE BUILD OFF 2


As of this Saturday sept 15th 2007, the build off at ratrodbikes.com has officially started. You can follow all the action, the drama, the sweat and tears as rat rod bikers duke it out in an all out battle to the end... Oops! Got carried away a bit, hehehe. The second build off at ratrodbikes was much anticipated by many, partly because the membership at the forum as grown a lot since the first one. Rat Bikers also love to build bikes and show off in a very friendly manner.

The build off is the perfect occasion for builders to not only show off their talents, but also to share ideas and find new ones. With almost 400 new members since the last build off, this should be very interesting. I cannot wait to see what new ideas will come out. The rules specify that the frame cannot be modified with welding equipment, this is to keep the playing field level for those who do not weld.

Last build off I showed up late and it was in the middle of winter. My entry ended up being a DNF for lack of nice weather, time and parts. NOT THIS TIME! I have the perfect subject, most of the parts I have or are easy to get and I have a vision! Vision and inspiration are two essential ingredients for this type of endeavor.

So go check it out, enjoy the show or better yet, sign up and join in the madness. :)

Rat Rod Bike Build Off 1

Rat Rod Bike Build Off 2

My entry 1950 CCM "Victoria"

Til next time, ride safe and Godspeed.

Gerry :)

Sunday, September 09, 2007

HOW TO BUILD AN INEXPENSIVE SUSPENSION RECUMBENT BICYCLE AT HOME PART 2 THE FRONT BOOM

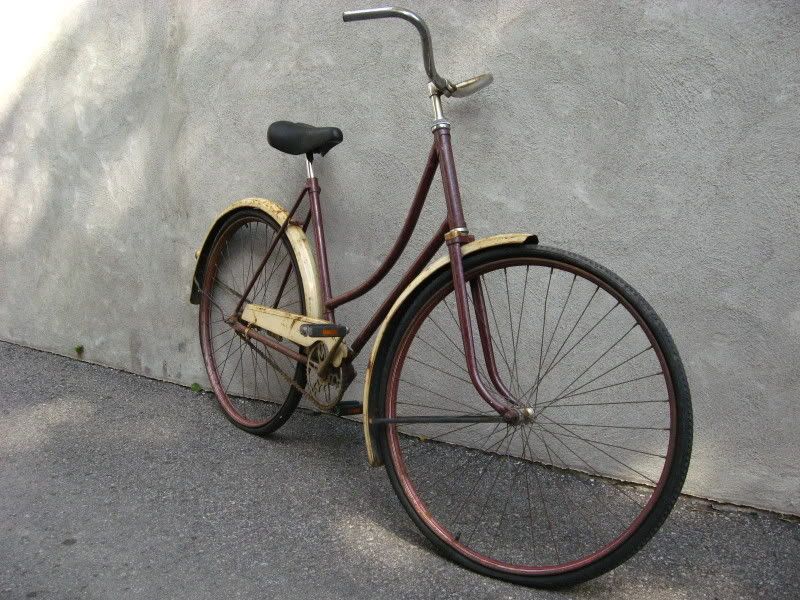
Before we build anything, we need some more parts. You need a road bike frame and fork. The fork will be used to connect the front boom to the frame and you will make the front boom from the lower part of the road bike frame. See and enlarge the image. You will also need the top tube of that bike to make the steerer tube extension which will be covered in the next post.

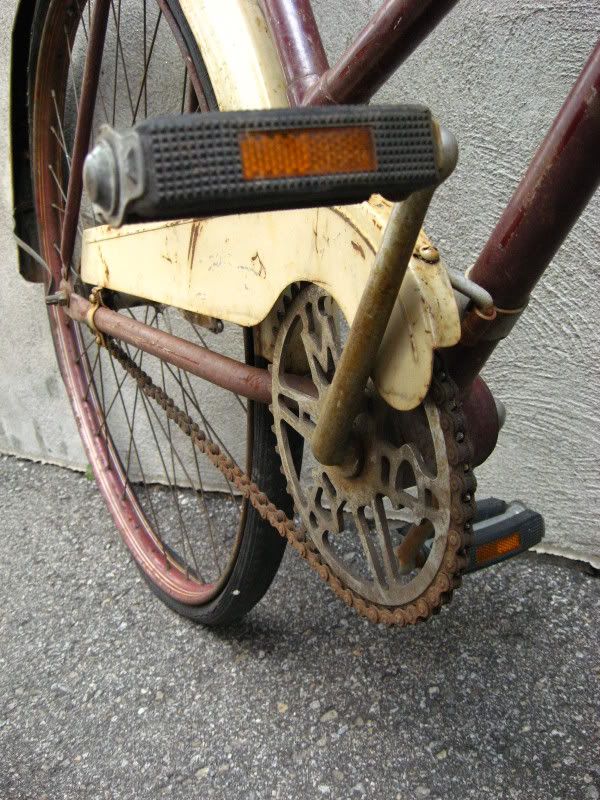
So you had some fun with the hacksaw and you have all your bits, let's start. I removed the bits of the seat tube on the mountain bike frame since they won't be needed. This will save just a little weight as well. Not a lot, but homebuilt recumbents are notorious for being heavy, so every little bit helps.

Now I have a drill press, but since most of you out there don't, I will use a regular drill to make my holes so you can see that it is possible. 15 years ago when I built my first recumbent I had a revelation when I realized that a fork steerer tube would fit almost perfectly inside a seat tube. That's where all those road bike frame parts come into play. Cut the lower frame of the bike as illustrated in the first image, cut more and remove some length later if it's too long. Now set that piece aside after cutting a slit about 4 inches long in the seat tube where it will be inserted in the steerer tube. This will help when installing the clamps in final assembly.

Now take the fork and cut it at the end where it starts to curve. Close to that cut, drill a hole on each side. Make sure that your holes are aligned. Now slide the cut fork in the mtb frame so that the steerer tube faces forward. See where you want to make your holes in the mtb frame and mark them. Drill the holes and bolt the cut fork into place. Voila, you have done the first step in building the front boom. The front boom will hold the pedals, crankarms and front deraillleur.

Noticed that we only installed one nut and bolt, this is to permit you to see where you want the boom assembly to sit. You want to make it as level with the seat as possible and high enough so you don't hit the wheel with your feet when turning and pedaling. At this point, it's educated guesswork since we have no seat, so do the best you can or wait for the end of this story. Building a recumbent yourself involves a lot of guesswork and return visits to the drawing board. Heck, that's half the fun. :) This recumbent will most probably end being the kind that you hit the wheel when you pedal and turn sharply. I don't have a problem with that since I found a solution for me some years ago: don't pedal when you turn.

After finding where you want the boom to sit, mark where your holes will be and drill them. You might end up with a gap between the fork legs and the mtb frame. Fill those gaps with washers and make sure to use the same number and size on both sides. Your boom must be aligned with the rest of the frame. Bolt down tightly and you will check those bolts for tightness after a few miles when it's done, if you have half a brain.

Lastly, insert the road bike seat tube that you cut into the steerer tube and admire your progress. At this point we don't have a seat and we are pretty clueless on where it will finally end up. So for now we will leave it alone.

The next post will cover the handlebars and how to make an extension for them.

Until next time, ride safe and Godspeed.

Gerry :)

Recumbent build Part 1
Recumbent build Part 3
Recumbent build Part 4

Tuesday, September 04, 2007

Vintage 1950 CCM Ladies Bicycle, mine...all mine!


Ok, this post is not about how to do anything. It's just about me proudly showing off my new acquisition. A very good friend of mine called me 2 days ago asking if I wanted an old ladies CCM bike from the 40's or 50's. Didn't have to think long about that answer especially since it was free. I always wanted one of those long swooping top tube ladies bike for my collection, to the dismay of my significant other (sorry babe).

I was able to date the bike using the serial number code. You can see the list below that I found courtesy of drumbent.com. Now I don't now if the series goes beyond 1960 in the same fashion, so if anybody out there knows, please fill us in and I will update this post.


Although built in 1950, the bike is a prime example of late Victorian era bicycle design built for ladies who wanted to go about in those nice big skirts. A lady would just not be seen wearing trousers in those days for any reason. The big swooping top tube made stepping through the frame very easy. Another feature that was found on those ear;y bikes was a net fixed to the rear frame and fender to prevent the skirt from ending up in the wheel spokes. A nice big whicker basket up front would complete the vintage ride.

The bicycle was a big part in the emancipation of women in the late 19th and early 20th century. No longer did a woman need a man to prepare a horse and buggy. The bike was ready to go any time and didn't need any feeding or cumbersome maintenance of the veterinarian or stinky kind. Took up a lot less room as well. All of a sudden, women could go anywhere in town and at a faster rate than walking.

My plans for this bike are not set in stone yet. I really don't have any big ideas. However, I know for a fact that I will not touch the finish of the bike. This rusty used up look gives it character. The wheels are completely gone but the front and rear hub can be laced to another rim since they are of the 36 spoke variety. Hope this post helped to at least inspire someone and motivate them to bring back an "Old Girl" back to life, or any bike for that matter.

Til next time, ride safe and Godspeed.

Gerry :)

Sunday, September 02, 2007

HOW TO BUILD AN INEXPENSIVE SUSPENSION RECUMBENT BICYCLE AT HOME PART 1


WARNING! LONG POST BELOW.

Well it should be, how else can I explain all this. :) I have been building recumbent bikes myself for the last 12 years. I've built 7 or 8 of them, I stopped counting at some point. "Recumbent Bicycle" was the very first search I did when I got connected on the web and that's where that crazy quest started. My main goal was to build a reliable recumbent for not too much cash. It took me 7 (or 8) bikes to accomplish that and I had a blast in the process. Building your own bike provides even more pleasure in the "quest" itself of making your own ride work. Finding solutions for all the bugs and actually making it work is truly rewarding.

I loved building and riding these bikes until I built the last one that was actually a very reliable ride. Then many things came into play for me to lose interest, I had reached my goal, I moved to the city (Montreal streets are notoriously bad) and I started getting into cruisers. Until 2 weeks ago when something happened...

...I hurt my back! No way I could ride my cruiser in this condition. The timing was awful since I was planning to ride at critical mass and I was invited for a night cruise with the Hannan choppers afterward. So out came my pocket rocket recumbent from the mothballs and I rode for at least 8 hours and had a blast that evening. I was surprised that after at least 5 years of leaving that thing alone in storage, all I had to do was adjust the brakes, put some air in the tires and it ran solid the entire ride. Even did some pretty stupid stuff and came out of it with flying colors.

The other ingredient for that mechanical soup, that you are about to learn about, was a donation of a full suspension mountain bike from a friend. I started thinking"hmmm, I always wanted to build one with a rear suspension..." and the mad recumbent builder took over like Mr Hide.

So here we go, let's build a rear suspension recumbent bike from junk. :)

First thing I had to do was strip the old mountain goat to the bare frame. There was nothing left to use on this thing. It was one of those rare bikes that I find with no useful parts left and the damn thing made me sweat 2 hours to take it apart. I had to hacksaw my way to her guts! I will have to make sure that corrosion doesn't become an issue later on, it was bad.

I gathered the parts that I already have: 20 inch wheel and tire, matching fork( I can't keep the original fork because I want to lower the frame and be able to use brakes on the front wheel.), a spare rear shock(nothing fancy just a regular Chinese job) since the original one is dead and my faithful "Pocket Rocket" recumbent to donate the rest of the parts. I will have to make another seat since the suspension doesn't allow me to use the one from that bike, more R&D.

After stripping the mtb I installed the fork and 20 inch wheel to see how it will sit and give me some ideas for problems to come. One big issue in any recumbent build is chain management. This one won't be different. Expect a full post just for that. At this point it is time to decide how you will progress and think of solutions. Good exercise for your brain believe me.

The next ingredient that we will need for this build is a men's road bike frame for various parts, more on this in part 2. Now this post will have all the links to all the articles for this build. I will try to update the build at least once a week. This all depends on how things go and what kind of wall I hit.

Lastly, before you go out all crazy and build one of these, be warned! These bikes go real fast downhill and if you are not careful about how you build one, you can very simply kill yourself. I am not there to take you by the hand to build anything, so don't come crying to me if your are stupid enough to build a bike half assed and get hit by a truck. I have listed other recumbent sites in the sidebar and I have many recumbent sites in the Bicycle Search Engine, do your research. Finally, always respect the number one rule of all homebuilders: When in doubt, OVER BUILD.

Til next time, ride safe and Godspeed.

Gerry :)

Recumbent Build Part 2
Recumbent Build Part 3
Recumbent Build Part 4