OUR ADVERTISERS

Sunday, December 24, 2006

HOW TO ADJUST A FRONT DERAILLEUR


A recent comment and request from one of my readers made me realise that I never posted on how to adjust a front derailleur. This is because none of my rides presently have one of these and I just simply forgot about it. So here we go, excuse the crappy pictures, but with the weather I'm stuck indoors and I haven't figured out how to take good ones inside....yet.

The front derailleur is a simple thingamabob that is springloaded and pulled by a cable to push the chain on the gear you want at the pedals. This how-to applies for 2 and 3 gear chain rings. Once you've adjusted with my method, the middle one should take care of itself on a 3 gear set up.

Before you begin, there are a few things to verify. First, make sure the derailleur cage is aligned with the chainring gears. Second, make sure the height is correct by pushing the cage with your hand towards you to make sure that it doesn't hit that last gear. If you need to move the derailleur, undo the cable and loosen the frame bolt and make the necessary adjustements. There, I just saved you at least 45 minutes of yelling, screaming and swearing!

Next, don't bother doing any adjustements before removing the cable from the derailleur. Let's start fresh. At the same time, verify that the cable is moving freely. Cables that are housed in a sleeve up to the derailleur sometimes have a nasty habit of jamming. What happens is that the sleeve's opening points upward on the derailleur and invites water in to deposit itself in there and marries it and the cable with a generous amount of rust. Replace cable and sleeve if that is the case.

Ok, derailleur moves freely by pulling it with your hands and the cable moves freely. Now keep the cable disconnected and put the shifter in the lowest gear position. Your chain should rest on the gear closest to the frame on the chainring(that's the name of the gears attached to the pedals)if you turn the pedals.

Next, shift the rear derailleur to the lowest gear in the back. That's the gear closest to the wheel spokes. Now look at the clearance between the inside of the front derailleur cage(closest to the frame) and see if you have a small gap between the chain and the cage. If the chain is rubbing on it or the gap is too wide, take a screwdriver and adjust the "L" screw on top of the derailleur. Turn the screw until you are satisfied with the results. Clockwise should push the cage outward and counterclockwise inward.

Now to verify that your gap is not too big, leave the chain on the lowest gear on the chainring and shift the rear derailleur to the highest gear, that's the one closest to the frame. If your adjustement is good, the chain shouldn't rub on the outside wall of the front derailleur cage.

Lastly, reinstall the cable and with keeping the chain on the highest gear in the back, shift the front derailleur to the biggest chainring while turning the pedals. Did the chain completely come off the chainring? That's because the front derailleur cage went too far and pushed the chain off. You will need to turn the adjustement screw "H" clockwise until the derailleur stops just before pushing the chain off the chainring. The reverse is true if the cage doesn't go far enough and the chain refuses to go on the last chainring.

That's it.

Til next time, ride safe and Godspeed.

Gerry

Monday, December 18, 2006

THE PERFECT BIKE FUEL: THE CHEESEBURGER!


Does that look yummy or what? Yes, the delicious Cheeseburger. I am no nutrionnist and I don't claim anything to that effect. So if you are about to fire an email to me(xddorox@gmail.com)to tell me in your best politically correct tone that I'm dead wrong about this, don't bother and go back to sipping your Caffeine Free Diet Coke(brown coloring in water!).

To me, a cheeseburger is the best food I can have in the middle of a long ride. I mean just check out what's in there! You have meat, dairy, bread and vegetables! Throw in a full flegde Coke and you have all the food groups. :) Mind you, you have to take it with all the trimmings. Also, I don't think that those winnie cheeseburgers from the golden arches qualify. I mean Burger King and Wendy's make a decent one, but the true Cheeseburger is made at one of those Mom and Pop restaurants. What better way to live the local experience when you travel than to eat in one of those nice little restaurants.

There's nothing that picks me up like a good and juicy Cheeseburger. The alternative of one of those bird food bars just doesn't cut it for me. Who cares about all of those calories, you will burn them off. Riding a bike at 65% VO2 max burns fat, so you don't have to go all out to keep your nice trim body or prevent that belly from growing out of proportion. Don't trust me on this, I have no clue of what I'm talking about! (Except for that 65% VO2 max thing, that's true, burns fat)

Bottom line is ride for the fun of it and don't take it too seriously. You will reap the benefits anyways.

Til next time, ride safe and Godspeed!

Gerry

Sunday, December 10, 2006

SEASON'S GREETINGS FROM ME TO YOU


This is my Holiday editorial, no how to's but a time to reflect and give thanks.

Christmas time has a different meaning to different people. This blog being international, I understand that some of you do not celebrate Christmas for various reasons. I myself believe that it is a time of year were we reflect on the year that just past, give thanks for the many blessings in our lives and get together with family and friends. It is also a time to look ahead and plan on where we intend to go on the path of life, helping ourselves and others in the process. Bottom line, it's a week to stop and smell the roses with everybody that's close to you.

This year was great for me because I found this internet tool called the blog. I'll be honest with you that my main goal when I started was egotistical in that I wanted to share my passion of the bicycle with as many people as I could. But then I realised with the feedback that I was getting that this was actually helping a lot of you readers out there and I figured that this could be pretty big. I mean, imagine if somebody in a poor country manages to get a hold of this information and with it can get mobile or learns the trade to feed his family! That would be awsome. My intention remains to share the passion of the bicycle, one of the greatest invention of human kind. I don't intend to get rich in the process, but to get as many of you rolling as possible. If I do make a few bucks out of it, great, I'll consider it a bonus, but that is not my main objective.

I will keep posting as many tips and tricks as I can and show you how I do it. I don't pretend that I know everything or that everything I do is perfect. But I will strive to do my best to inform you, the reader, every chance and post I can. Keep sending me feedbacks, check out the advertisers if they look interesting and get your hands dirty.

Lastly, a thousand thank you's to you the reader of this blog for making it the success that it is. I wish you all a very happy holiday season, health, happiness and prosperity for the new year. Take the time to stop and smell the roses, enjoy life and if you have kids, take the time to hug them and tell them that you love them.

Til next time, ride safe and Godspeed.

Gerry

p.s. The antlers were not photoshopped in the picture, I actually wore them!

READER PROJECT SINGLE SPEED FIXED GEAR BIKE


One of the greatest things about this blog is when I get feedback from you, the reader. I received an email from Jose today about his current project inspired by this bike repair blog. Jose is serving with his nations Armed Forces and he is stationned overseas. Yet, he has managed to find a road bike carcass and decided to turn it into a single speed fixed gear bike.

The great thing about bikes, is that their parts are interchangeable from one bike to another. One example is the bottom bracket where the pedal axle resides. In this case, Jose's bike has an English threaded bottom bracket, this setup has not changed in over a hundred years. The only thing he has to worry about is the width of the axle. He will be able to fit a modern sealed bottom bracket on that thing in a snap.

Road bikes are plentiful and cheap. You can locate one in decent shape and rebuilt it as a road racer, touring bike or, like in this case, a fixed gear bike. One strategy that I encourage when doing projects like these is to start with what you have and buy the least parts to get you rolling. This way, you'll find out if the ride is suitable for you without spending too much cash. If the ride is good, buy your upgrades as you can afford them. If it doesn't work out, you won't have spent a whole lot to find out. But don't throw that bike away, keep it for those parts!

Jose will keep me posted with his progress and I will put up the pictures as I receive them. In the meantime, feel free to do the same and send me your pics of your projects if you want them posted here at: xddorox@gmail.com

Til next time, ride safe and Godspeed.

Gerry

Wednesday, December 06, 2006

HOW TO FIND A BICYCLE SHOP OR CLUB ON A MAP


Ok, I usually post about stuff that can be useful where ever you are on the planet, but I'm making an exception. What the heck, this my blog after all! Anyways, I came across this great website that permits you to find anything on a map, in the US. I mean not just businesses, but clubs as well!

The site is mapmuse.com and permits you to find stuff and presents it to you on a map interface. This is great if you plan to go somewhere and want to know what is around the area that you will be visiting. It's also good if you want to know what's available around you if you live in the United States.

It's pretty simple to use. Not having a map of Canada available on the site, I decided to find a bikeshop owned by distant relatives in New Bedford Mass. I went on the site and bicycle shops where already listed in the "most viewed" list. That's too easy and there is no garanty that bike shops will always be on that list. So I decided to see if finding the bike shop was easy enough the hard way. It was.

1. Click in the "Sports and recreation" category and "bike shops" is the second one on the list. You will also notice that "cycling clubs" is on that same page in the 7th position.

2. Once you have clicked on "bike shops" it will show you a map of the US and will give you a few choices to do your search. You can search by address if you have that information, by region/state or by city/metro area. In this case, I clicked on New Bedford MA.

3. BAM! There is the map and there's the bike shop. Very clear and precise. But the fun doesn't end there...

4. Click on the "B" box and you will get all the information related to that location.

This site is great when you have a general idea or no clue of what you are looking for in any area of the US. Now if only this thing was available for the entire planet. Wouldn't that be great? This website is a great way to plan a trip to anywhere. It can find you a lot more than just a bike shop. I guess I'll be busy playing around in there for a little while...

Til next time, ride safe and Godspeed.

Gerry

HOW TO PREVENT RUST ON YOUR BICYCLE


I was walking in downtown Montreal today and couldn't help but notice this bike. It was locked with a proper U type lock, but there was enough space left between those bars to let the Titanic pass through! Some thief could easily put a spreading tool in there and pop that lock. But the one element that got my attention was that empty seat tube. The owner chose wisely to remove the seat, that is probably held there by a quick release mechanism, but didn't realise that he left his frame open to the elements and the most sinister of enemies, RUST.

Rust is that sneaky chemical reaction that makes unprotected metal react with air and moisture to eat away slowly at your pride and joy. The inside of the frame is not painted or protected in anyway against the elements. If you have to remove your seat, make sure that you cover it in order to avoid water or moisture to get in there. Once rust starts snacking on the inside of your frame, you're screwed. I had a beautiful cantilever frame cruiser snap a downtube on me because of this(Rest In Pieces "Carbait").

The outside of the frame is also vulnerable to the elements. That paint can get knicked and scratched and the exposed metal will eventually rust. Buy a small amount of touch up paint and do those touch-ups as soon as you find them. If you already have some rust showing, make sure to sand it off before applying the paint. Painting over rust will only mask it until it shows it's ugly face again in a very near future.

Remember that when rust shows up, it's almost as hard to get rid of as your in-laws. ;)

Til next time ride safe and Godspeed.

Gerry

Sunday, November 19, 2006

HOW TO GET A BIKE LANE


Riding a bike in traffic is a perilous journey. Safe and well planned bike lanes can get you from point A to point B in a secure fashion. Not all local and national governments seem to agree on this or don't think that it is necessary. Like any other change that can be done by the people we put in power, the only way to get things done is by letting them know what we want. Sometimes just asking is sufficient, I know this by working for a government body. Elected and public officials don't have all the answers and just taking the time to tell them what you want can result in positive action. It doesn't always work that way, but sometimes it does when it is in the domain of the possible.

When the powers that be need a bit more convincing, a petition is a great way to go. There is one right now that Canadian Citizens can sign to push for more bike lanes at: http://www.gopetition.com/online/10170.html

For those of you living out in the rest of the planet, www.bikelane.com is a central point for all bike lane advocacy. If you don't find anything there, start your own group. If people from the mass never get involved, nothing will ever get done. Bike lanes are not only good for cyclists safety, but can get more people riding bikes and less people driving cars. A bike lane is also a great way to slow down car traffic.

Good luck and Godspeed to all of you out there.

Gerry

Thursday, November 09, 2006

HOW TO RIDE A BIKE IN THE WINTER


Winter sucks! That's my philosophy anyways, if you're lucky enough to live in the snow belt and want to ride in the snow, read on. I don't snow shoe in the forest, I don't snowboard and I don't ski. I just can't stand winter. My only winter sport is to shovel snow out of my driveway because I'm cheap and it is the only exercise I get in the winter months.

14 years ago, that wasn't the case. I had bought my first brand new bike. It was a store variety cheapo mountain bike with side pull caliper brakes. It wasn't much, but it was a lot better than my old ten speed $15 special from the garage sale. I had moved close to my job at the Fire Department and driving to work was just stupid. I had used the $15 special for the entire summer and I had saved enough cash to buy the new bike. It was in November, by the time I had put the whole thing together that faithful day, wouldn't you know it, it started to snow!

My girlfriend told me that it was too bad I couldn't ride my new bike to work. "No way" I said, "If this thing can climb mountains, it can surely handle a little snow." and that's how 7 straight years of going to work 12 months a year started. This little event also pushed me in the bike repair business, I had to ride in the winter and back then bike shops were closed in the winter. I had to be able to fix my bike myself, so I got educated in the realm of bike repair.

But back to winter riding, this article will be how you can do it for as little money as possible. First thing you need, is a crappy bike. I learned that you must sacrifice a bicycle to the harshness of winter if you don't want to destroy your favorite ride. Winter riding can be hard on you, but your machine is equiped with an exposed drivetrain that has to take a lot of abuse from the elements. In the spring, it won't be pretty. Find an inexpensive bike that you are willing to sacrifice.

The Bike

Like I said, the bike you will use to ride in the snow will not have an easy life and its drivetrain will suffer damage even if you are careful. Choose a bike that you don't mind trashing, buy a cheap used one or find one in the trash. Avoid curved racer handlebars, you need to be upright and having an aerodynamic riding position is the least of your concerns.

You will need to put fenders and a rack on that bike. Nothing is worst than riding in cold weather with a wet butt, just make sure that you have plenty of clearance between those fenders and your tires to prevent snow to get packed in there. The rack is necessary to carry your stuff. You need all your skills in snow riding and a backpack will influence your body movements. Put all your gear on the bike so that your body is free to move without any interference.

Tires

Big debate here, chains, studs, knobby, skinny, anything goes and I tried most of them. The main problem in the winter is road conditions. Snow and ice are your main enemies. You would need a specific tire for each condition, but that's not really practical.

I never liked skinny tires since they don't seem to grab well in the snow. I have always used a set of mountain bike knobby tires with the tire pressure down 10 lbs from the prescribed maximum. They are good at eliminating snow build-up on the thread and are decent in most conditions.

I made my own studded bicycle tires with a set of almost finished mountain bike tires. I simply drilled holes in the middle and side threads of the tire and applied small steel nuts and bolts. The nut is on the outside of the tire and the inside is covered with duct tape to protect the tube from the head of the bolt. This works very well, but has a drawbacks. Homemade studded tires are HEAVY, this translates into more energy needed to make the bike go forward. Winter is already a pain to pedal your bike anywhere and this added resistance doesn't help at all. I used them for a month and finally went back to the regular knobbies. I figured that for the few times that I needed to ride on ice, it wasn't worth the trouble. I relied on my riding abilities and in the worst cases, I walked my bike home.

Lubrication

I've tried all sorts of things on my chain and drivetrain to protect them from the elements and nothing is bullet proof. You must wipe down and lube your drivetrain on a regular basis. That's the big secret. Just make sure you use something synthetic and keep the thickness on the light level. Don't forget to lube those exposed brake and derailleur cables. In the spring, change all cables and the chain. If you wait for the Fall to do this, everything will be seized(been there). If they are well lubed, your derailleurs should survive a few seasons, just don't count on this if you have fancy ones, stick with the really cheap stuff.

Brakes

Well the best brakes hands down for winter riding are disk brakes. But if you are in a position to trash a disc brake equiped bike for winter riding, you probably don't and drive around in the winter with a big expensive SUV. If you actually do ride a disc brake equiped bike in the winter, I don't have to tell you that you have it made. For the rest of us who have pad to rim brakes, try avoiding chrome steel rims. They are the worst for any knid of wet braking. If you have no other choice, just keep in mind that you will probably have to plan ahead all of your stopping needs!

How to ride in the snow and ice...

...very carefully. Remember that any time you ride, the actual contact between your bike and the pavement is about the same surface as your thumb. Throw some snow and ice in the mix and it's time to slow things down. Ride slower, don't lean in your turns as much, look ahead and always be conscious of the surface you ride on. This is no time for riding with your mind wandering off somewhere, pay attention! As far as cars go, people will see you most of the time and they are thinking that you are nuts, a bike in the winter is pretty hard to miss.

Safety

A helmet, proper lights, front and back, and a reflective vest are not an option. Do not even consider winter riding without any of these.

Clothing

You don't have to buy expensive winter gear. Just keep in mind that you must put on multiple layers. I had also a good pair of ski gloves and ski goggles with a balaclava(Don't forget to take this off before you go into a store...).

Storage

The best thing to do in the winter is to store your bike inside when you are not using it. Wipe down after everything as melted off. If you are stuck parking it outside, wipe the drivetrain on aregular basis and keep in mind that cables can snap in cold weather. Warm them up before the ride by using them gently a few times before you leave.

In all the years that I rode in the snow, I only fell twice and never broke anything. I loved it and I even preferred it to taking the car when I had the chance. I preferred to get on my bike and be warm within minutes instead of freezing in the car all the way to work. Cold weather, even in the -35C(-30F) range is not that bad. Remember that your worst enemy is the condition of the road surface you're riding on..

Until next time, ride safe and Godspeed.

Gerry

Thursday, November 02, 2006

SHOW THE WORLD YOUR BIKE!


I haven't had the chance to put out any how-to's lately for the simple fact that I am trying to figure out how to post decent articles on wheel repair and wheel building. The sun is gone and the cold weather is here in Canada, so I'm stuck indoors people. That it is not too good for pictures. My shop is in the basement and lighting is crap! I might have to freeze my fingers off and take the pics outside anyways during the few hours I have available during daylight. You'll find out soon enough.

In the meantime, I've received many comments from all over the world that this blog is helping you out. I would love to see some of your handy work. Send me pics of your rides, your handywork, your neighbourhood on your bike, you name it. If I get some decent pics with some details, I'll post it. Doesn't have to be fancy, after all this blog is not about fancy bikes. Right? It's about rides with character. So, send me your stuff at: xddorox@gmail.com asap!

Thank you all for your great support, I'm having a lot of fun with this and I'm happy that I can share it with so many of you.

Til next time, ride safe.

Gerry

Saturday, October 21, 2006

HOW TO REPAIR A 3 PIECE AND SEALED BOTTOM BRACKET


Well, this is it, welcome to bottom bracket Hell! The lowest, nastiest and filthiest part of your bike, but one of the most important. The bottom bracket holds the axle that not only makes pedal motion possible, but also carries your weight while on the pedals and takes other kinds of too long to mention abuses.

First we'll see how to take a bottom bracket apart and put it back together. Then we'll look at some specifics and do some bottom bracket troubleshooting. It is called a three piece cranck because it has three distinctive parts compared to a one piece crank. There is more then three parts, this moniker refers to the axle and two separate cranks. In comparison with the one piece crank that makes office of both crank and axle.

To take one apart is not that hard, when you know what you are doing and have the right tools. The bottom bracket is one part of your bike that requires a specialty tool and there is no way around that. We are tlaking about the pedal puller. This is the only tool capable of removing pedal cranks. The other tools you'll need are a ratchet with a 14 mm socket, and pair of big pliers and a big flat surface to remove that little plastic cover. I hear you pro mechanics out there screaming and yelling about using pliers to remove any piece of the botton bracket. Yes there are specialty tools for the job and you can buy those at your local bike shop. However, this blog is aimed at people around the world who don't have a ton of money and this way has worked well for me since I began working on bikes. So, with this out of the way, let's proceed.

Removing and repairing a 3 piece bottom bracket


1. Find a big flat something and unscrew the cap off the screw that bolts the crank to the axle. Don't use a small screwdriver, the plastic cover will break inside the crank and you will spend the next hour digging it out.

2. Take your 14 mm socket and ratchet, unscrew the bolt that holds the crank to the axle. Remove the bolt of both cranks(Left and Right). You can squeeze the handle of the ratchet and the crank together like pliers to give you more leverage.

3. Take the puller and screw it's socket inside the threaded hole of the crank. Hold the crank and turn the puller handle clockwise until the crank arm falls off from the axle by itself. Remove both crank arms.

4. Go to the left side and with the pliers firmly held with both of your hands(This is where the pictures differ, I'm taking a picture at the same time.), unscrew the lockring from the bearing cup.


5. Now again firmly with both hands, grab the bearing cup with the pliers and slowly test the resistance. You do not want to slip here since this will definitely strip the thread on that cup. Hold those pliers hard and go slowly, it should get it going within a quarter turn and then you should be able to unscrew it with your fingers. If not, keep on going and be careful. Remove the cup.

6. Remove the axle and bearing crowns from both sides.

7. Remove the right side bearing cup by unscrewing it in a clockwise fashion. The notch are not very wide, so might have to hold the pliers on the cup with one hand and the handles with the other. Go slowly, I've pinched the inside of my hand on a few occasion. Be aware that this cup is often very hard to remove. Again, you can always purchase a specialised wrench just for that purpose. I'm just cheap!

8. Clean and inspect everything. What you are looking for is a clean and even line on the axle and inside the bearing cups. Any pits in that line will damage the bearings and they will eventually self destruct. Replace any parts that need replacing.


9. Regrease everything, the axle, the cups and the bearings. I use regular green axle grease with a touch of white teflon grease. Make sure that everything you've pulled out of that frame is extra clean, including the hole in the frame where it came from. The most minute piece of crap can ruin your repack job.

10. Start by installing the right side bearing cup. Screw it in counterclockwise real tight. Insert the bearings and the axle. Insert the bearings in the left bearing cup and screw on the frame. Screw it until you feel resistance. Test to see if the axle turns freely and tug it up and down to see if there is any play. No play? Turns freely? If the answer is yes to both questions, install the lockring on the left bearing cup.

11. Reinstall the crank arms tightly. I would check them again in a few weeks to be sure. When you think it's tight enough, tighten some more. That's it, you're done.

VARIATIONS

The sealed bottom bracket
The sealed bottom bracket is the same thing but it is in one piece and the bearings are sealed. You need a special ratchet socket to remove it. You cannot repack or adjust it. If it's busted, you have to buy and install a new one. Some like this type of thing, but I don't. I like to be able to fine tune my bottom bracket axle.


Cotter pin crank arm removal
Some older bikes keep the crank arms on the axle with cotter pins jammed between the axle and a hole in the crank arm. It is held together by a nut. An old bike mechanic taught me the secret on how to remove these. Sorry, I had no cotter pin cranks in stock and can't provide you with pictures of this. Guess you'll have to make it with the written word.

1. Set the crank arm at the 6 O'clock position.
2. Unbolt the nut, remove the washer and reinstall the nut with a 2 mm gap between it and the crank arm.
3. With the crank arm still at the 6 O'clock position, give the bolt a solid wack with the help of a good hammer. If it moves inward, you're ok. Repeat this 2 mm at a time until it comes out.

I don't know why, but it works. If you put the crank arm at the 3 or 9 O'clock position to punch out the pin, the cotter pin somehow jams itself and the only way to remove is to drill it out. This method works 90% of the time. If it doesn't come out, your only option is to take a drill to it.

Bottom bracket troubleshooting, or that cracking noise you hear when pedalling.

Ah yes, that annoying cracking noise when applying power to the pedals. This problem comes to my attention often and the tricky part of it is that you have 3 variables to consider to eliminate it.

1. Check the pedals, if their bearings are loose, this could be the source of your problem.
2. Pedals are ok. Alright, check the crank arms one at a time to see if they move sideways. If one oif them moves and not the other, then it's loose and you need to tighten it up. Take note that when a crank arm falls off by itself, the square inside that holds it snug on the axle have rounded off and it will never stay on however hard you tighten it back on. You must change it.
3. Both crank arms move sideways at the same time. The bottom bracket axle is loose. Unscrew the lockring on the left side and adjust the left bearing cup until there is no movement.
4. If the noise still persist, you might have pitting on the axle or cups. This will call for a complete bottom bracket overhaul. But hey! Now you know how to do that. :)

Until next time, ride safe.

Gerry


Thursday, October 19, 2006

Biking with your family, how to enjoy cycling with others and build better relations.


Well I haven't written anything in a while, real world came back to bite me in the butt and couldn't get time to update my favorite blog. Now that I can, I'll share with you a bit of my summer, cycling wise.

I've been an avid cyclist for the past 15 years and in the past 2 years, not much was happening. Then this whole blog thing happened and it got me back on track. My family has always been happy to share my passion, especially my kids. I even once managed to coarse my wife to come with me on a mountain bike trail ride! That's when I learned something really important. People that you take with you on rides are not always at the same level that you are. I love my wife and that love grew some more after she fell during that ride. Right there I realised that I took her on a very technical trail that was better suited for an expert rider. She knew that in the first minutes and didn't complain wanting to share in my passion. That day I realised afterwards that she loved me even more than I thought and she gained even more respect and admiration from me.

That lesson being learned at the expense of some bruises to my significant other, I made sure I would never do that same mistake again with my kids. The first rides with my kids were in the neighbourhood and I always let them lead the way. That would prevent me to impose my pace on the ride. My son grew up to be faster and better than me and my daughter has a slower pace since she doesn't ride as much and suffers from asthma.

This summer I took the usual rides with my son, going on nowhere rides, club rides and just spinning around the neighbourhood. My son leads the way now since he is much faster and stronger than I am on the pedals. The old man holds him back! I did show him how to enjoy the view while riding at a slower pace and he did enjoy it very much. Our favorite ride is a 60 km trek to downtown Montreal and the old port district. We even managed to get on the F1 circuit and had the pleasure to go one lap on our bikes at the track. The one cool move of the day was to use the subway system to zoom back downtowm with our rides. This saved us a lot of time and permitted us to cover more ground.

Me and my wife threw the bikes in the minivan and went outside of Montreal to explore little towns at a slower, and much safer, pace. The only preplanned concept of the day was the direction: East. That day was a lot of fun and permitted us to unwind in a very different setting. Exploring small towns on a bike is by far the best way to see them.

My daughter always wanted to do the downtown ride but was afraid she couldn't make it. I told her that this was more than possible and I would gladly take the time to take her. Her eyes lite up at the mere mentionning of this possibility. I had bought her and her mother an electric assist bicycle the summer before and I figured that she could make it on one charge. The fact that I was using my 45 lbs cruiser would force me to slow down from my regular pace and walking up hills instead of hammering them on the bike is becoming quite appealing as I advance in my forties.

We started off smoothly and took a few breaks in parks along the way, enjoying the view and beautiful summer scenery. This also gave us time to share what was happening in our lives as she is now starting to become more of her own person. We laughed, ate food from a Subway that featured personnel with attitude (The food was great mind you), tried on a ton of sunglasses at a stand and even saw some undercover cops busting somebody on the street for something. We made it back home with some juice still left in her electric bike, no bruises or pain and a great father/daughter bonding experience.

When I asked Sarah what was her favorite experience of the summer, she told me that it was a tie between her 2 week musical camp and that one day that we spent together on that bike ride. I guess the lessons to be learned about this is, always match the level of riders that ride with you and never underestimate the value of the time that you spend with your kids.

Until next time, ride safe.

Gerry

Monday, September 11, 2006

My Raleigh Choppers, coolest bike EVER!


I will take a break here and give myself a little gift. I'll tell you the stories of the two coolest bikes I have ever owned. Both of them happened to be The Raleigh Chopper. First, a little background history of the coolest bike you could own in the 1970's:

Back in 1966, The Raleigh Bicycle company was in a slump and needed a new idea. They sent their chief designer to America, Alan Oakley, to have a look at the latest bike craze that were known as "mucle bikes" in the likes of the Schwinn Orange Krate. This trip got Mr Oakley's brain going and while on the flight back he drafted a rough sketch of the Chopper on the back of an envelope. The bike was first sold in the US in 1968, but without success. It was then sold in the UK in 1970 and that's when it started to become very popular. Fortunately, it was also popular here in Canada. In 1972, Raleigh changed the model somewhat after some complaints and shortened the seat and frame, it was called the mark 2.

Fortunately for me, both of my encounters with this bicycle icon was with the mark 1, the original design. My first Chopper was acquired used for $24 cdn back in 1973. I was 8 years old and my uncle had found it for me. I had collected empty beer cans all summer to pay for it. It was all worth it. It was a red 10 speed with the high backrest sissy bar and it had already lost the original fork to an accident of some kind. The replacement unit was green. I can still remember the first time I saw it. My uncle pulled it off is Datsun 210, got on it and said:"Check it out, it's made to do wheelies!" and he immediatly pulled three wheelies in a row without even trying hard! My brain was floating in Jello while my mother was screaming at him for giving me stupid ideas.

Riding the Chopper was a handful back then, I was a small kid and that thing was pretty big. One thing that was obvious from the beginning, the back brake was just a decoration! I could squeeze that brake handle with two hands and nothing would happen. That didn't stop me from going all out. I remember one decent of a not-so steep but very long hill, I was pedaling to get as much speed as I could. The only problem is that the road ended sharply at the bottom and you had to either turn or stop fast. This run had produced the equivalent of lightning speed for an 8 year old and I was so buzzed from the rush that I had forgotten to slow down. Crushing both brake handles at the same time produced the most amazing endo that I've ever experienced before or since. I flew 20 feet in the air and landed on my hands and knees in some rock pebbles, OUCH! I was very fortunate that my family jewels didn't get caught in the frame mounted stick shifters.

The coolest thing about the Chopper, apart from actually existing, is that it was made for doing wheelies. It would seem that a Mark 1 Chopper could pull off a wheelie while parked! The fact that you were sitting directly over the rear wheel axle helped things a lot. The wheelie "sweet spot" was very easy to find. Well, 2 summers of being the kid with the coolest bike around came to a sad end in the spring of 1975. The Chopper was stolen, to this day it is the only bike that was ever stolen from me.

Fast forward 20 years into the future, I am married with two kids and holding down a job. The last thing on my mind is a Raleigh Chopper, until I see this article in "Bicycling" and there it is, a beautiful black Raleigh Chopper. It is a Mark 2 three speed, but it is just as awsome as it was 20 years before. At this point in my life, I had returned to cycling and even got trained as a mechanic. I decided then and there to start a quest to find another Chopper.

For three years I searched with no luck. Not even collectors could help me out, I couldn't find a single Raleigh Chopper for sale. But then, a miracle. I was coming back home by a different route when I slammed on the brakes not believing what I was seeing. It was Orange, it was a Mark 1, it had 3 speeds, it was all there...in the garbage! I rang the doorbell with my heart beating at 145 bpm, "Excuse me lady, uuuuhh that bike over there, could I give you $20 for it?". The lady said, "No way, just take it, it's yours". I thanked the lady and the all mighty and I was on my way home with my prize.

I ran the Chopper in it's original condition for about 3 years before I took it apart to restore it to it's golden self that you see in the pictures. The Chopper was never issued in Gold, but I figured that since it was my bike, I could do whatever I wanted with it. So gold it was. The ride was awsome and the brakes were still as useless as they were 23 years before. I took it out on many local club rides and it never saw a sprinkle of rain. I enjoyed it for another 3 years and I decided to sell it. The buyer is a deserving guardian who paid a hefty price in dollars to take care of the Chopper. The coolest part is that my kids got the pleasure of trying out and using one of my childhood bikes.

I have no regrets in selling it. For me this was a full circle experience and I was glad I had the chance to live it. It was kind of funny when they brought the Chopper back in 2004. I even tried one out in the store. Somehow the safe seat, safe rear brakes and non family jewel threatening handle bar mounted shifter just didn't do it for me. Even my kids were not impressed, my son even said"It's nowhere near the real thing dad.". In this case, you can't beat the original.

UPDATE

Here's some more details about the history of the Raleigh Chopper. This was given to me by David Gagnon who seems to know a lot more about this than I do. Here's the story:

"Alen Oakly(Raleigh designer) went to the States in 68 & saw the ugly Ross Apollo, no doubt. & figured it needed a redesign if it was going to make a moon shot. It was spring 1969 when the first few carmine Raleigh badged, heron everything, tall frames were sold in Canada & maybe Australia, South Africa. By Sept 69 it was available for sale state side, with the Chopper decal. Raleigh only made a handful of these first test bikes, Or the Pre Chopper & were kept a trade secret A correct bike would be worth $10,000.00 - $15,000.00."

Bike safe, have fun with your kids and Godspeed

Gerry

Saturday, September 02, 2006

How to install and repair sidepull caliper bicycle brakes video

Here's a video on how to install a new cable for a sidepull caliper brake on a bicycle. The one thing you don't see clearly on the video is the insertion of the cable in the retaining bolt. There is a small hole in there that you have to pass the cable in before you tightened the bolt. Apart from that, it is pretty easy. Have fun and ride safe.

Gerry

If the video below doesn't work, simply go see it directly on YouTube by clicking here.

If you need more info on brakes, go to the main brake article here. You will find more info but no cool background music, you will have to provide your own. :)


Thursday, August 31, 2006

HOW TO REPAIR BICYCLE CHAIN VIDEO

Here's a video I did on how to use a chaintool to take apart or reassemble your bicycle chain. For more info on the chaintool or chain, check out the original post linked below the video. Have fun and ride safe.

If for some reason the video below doesn't work, you can watch direct from YouTube by clicking this link.


Original bicycle chain repair how-to article


Gerry

Sunday, August 27, 2006

HOW TO BUILD A CHEAP BUT GOOD BICYCLE TRAILER

A little while ago I built a big cargo trailer so I could carry big and heavy loads. Th experience was succesful, but the trailer is a bit too big for everyday use like getting groceries. So I decided to build a smaller one with a built-in carrying box to avoid dirtying my groceries or whatever stuff I wanted to carry. Here you will find a complete how to article on how I did this, except for the hitch. The details for the hitch construction can be found on the big trailer build.
My first idea was to build this from broken hockey sticks. New lumber is always green and it never comes out straight. Hockey sticks are always straight, strong and broken ones can usually be found for free. But no luck in finding hockey sticks at this time of the year, but I did find a baby crib in the trash and that would do just fine. It also came with a board to cover the frame, bonus! I also found a kids bike with 14 inch wheels and tires in the trash and an old abroller to make the trailer arm. Broken dreams of easy perfect sixpack abs would now be transformed into sexy strong leg muscles! I salvaged parts from the bike as well that can be used on full size bikes, a sidepull brake caliper and pads, brake cable and housing, chain, a headset washer for my CCM Galaxie project, a bell, various nuts and bolts.

First I dismantled the crib bottom to salvage the lumber and board. I cut everything to size for my use. The trailer measures 26 inches by 26 inches. Since I was using a front and rear wheel, the gap between the outside and inner side was different. Take your measurements from the wheels you'll be using and make the frame accordingly.


Second, I screwed the frame
together using Robertson wood
screws and steel corner braces. I then did a dry fit assembly just to make sure that everything was coming out right.


Third, take some electrical box cover plates to make wheel mounts. Cut them in half. Drill a hole and then with a hacksaw, cut a channel for the axle to go in. I made one a little higher than the other to allow for some camber in the wheels(The wheels tilt inward if you look at the trailer from the front or back). This makes the trailer more stable. Mark your plates "inside" "outside" so you don't mix them up during assembly. Mark the middle of the frame and the middle of the plates. Drill some holes and bolt the plates to the frame. Put on your wheels and make sure that they are both parallel and straight to the frame. Take off the wheels and paint the frame.


Fourth, reinstall the wheels and make your trailer arm. I used an old abroller, but any piece of steel or aluminium tubing properly bent will do. The distance between the trailer and the hitch attachment should be 16 inches, I have a 26 inch wheel bike . I screwed in a piece of wood to the frame to elevate the arm to the proper height and then screwed in the arm in that piece thinking it would be strong enough...WRONG! At the first test ride, I almost lost my trailer into rush hour traffic, I had put in a safety strap just in case and that saved the day. I went back and drilled two holes through the arm, wood spacer and the frame. I used two front wheel axles to bolt everything solidly together. I ignored my first rule of homebuilt vehicles: When in doubt, ALWAYS OVERBUILD!

Fifth, Screw in the carrying box to the frame and use some washers. I bolted the box at 6 places. I also added a small tool box in the front to carry my lock and bungee cords in the same fashion. Leave some space between the tool box and the main carrying box so you'll be able to open its cover. Screw in some hooks around the frame so you can attach bungee cords to lock the lid in place or to strap down extra stuff carried on top of the box. Install a reflector on the back of the box or a light if you plan on using it at night. Pin to your bike and go get stuff.


The first grocery run

I used the trailer on the very first day. I went out to get $60 worth of groceries about 3km away. I used to go and get whatever I could carry in one bag or on my rear rack, which is not much. People where looking at me funny when I came out of the store and headed for the bicycle stands with my grocery cart! I had bought the following:
- 2X 2 litres of Diet Pepsi
- 1X 4 litres of milk in three bags
- 1X 1 litre of skimmed milk
- 1X 1 box of 8 frozen hamburger patties
- 5X Packages of various cold cuts
- 4X Cooked 3 pieces fried chicken meals with coleslaw, fries and sauce.
- 12X hamburger buns
- 12X hotdog sausages
- 12X hot dog buns

All of this fitted inside the box without any problem. I had some doubts when I started unloading my cart at the check out counter, but my doubts were squashed soon enough.
I carried this home with no problems and I felt great. I'm happy with my new toy and I hope you build and enjoy one yourself.

-Lumber = free
-Wheels = free
-Steel tubing = free
-Hardware = $8
-Box = $8
-Leaving the gaz guzzling, money pit, breaks at the worst possible time minivan at home for getting stuff I need = priceless!

'Til next time, keep your hands dirty and Godspeed.

Gerry

Saturday, August 26, 2006

HOW TO BUILD A BIG CARGO TRAILER, TRAILER IN USE


Just an update for the Big El Cheapo Bicycle Cargo Trailer. It's fun to show you how to build a trailer, but it's also fun to show you how it's used. Here we have two pictures of the trailer in use, the first image was a test. I carried the tandem bike frame just to see if the trailer could do the job. The second image, the trailer is actually working hard. I was testing the small grocery cargo trailer when I found this big piece of furniture by the side of the road. I rushed back home and pinned the big trailer on the cruiser and went back for it. The load was so well distributed that the hitch was not affected at all by the heavy load. I pedaled using only the two lowest gears and it went pretty good.

In the image, you see the bike being supported only by it's standard kickstand.

If you want to build a small grocery getter trailer for your bike, check out my new build article on the subject.

Til next time, ride safe.

Gerry

Wednesday, August 23, 2006

HOW TO REPAINT YOUR BICYCLE


I am repainting and rebuilding a vintage CCM on my other blog: Great Canadian Bike Overhaul. If you want to know how to repaint your bicycle, you can view the articles linked below with all the information regarding this task. The bicycle is presently in the primer stage. Color and clear coat will follow within the week, weather permitting(I have to work outdoors).

Sunday, August 20, 2006

HOW TO PREVENT BICYCLE THEFT


Bicycle theft is rampant in major cities and suburbs. Nothing stands in the way of a determined scumbag who wants to grab your ride away from you. But, there are some steps you can do to prevent that.

AT HOME

Your main objective is to make life hard for any thief who wants to steal your stead. May it be at home or when your bike is left by itself somewhere else. Let's start with home shall we? I've heard of determined thieves who took off with a bike that was left on a third balcony with no stairs, so read on if you think that your ride is safe at home. If you have a bike of any value, you should never leave it outside for extended periods of time. In urban areas that is just not possible. Forget about taping up your frame to mask it's make and model. Thieves know what they are looking for and they will make your bike if it's worth a bunch of cash. If you can't let your baby sleep indoors and it has to stay in a shed or storage locker, make sure that the storage space is properly locked AND properly lock the bike itself. Hide it from prying eyes as well, no need to advertise that you have an expensive ride waiting to be snatched up.

LOCKS

On the subject of locks, what you pay is what you get. If you spend a few bucks to lock up your $1 000 bike, it will disapear. Especially if the bike is left out of sight for more than an hour. My lock is a basic no name U-Lock, but I never leave my cruiser alone for more than 30 minutes. If you need to leave your bike somewhere, get a decent lock. Better yet, get a real trash bike just for your day to day stuff and use the nice one when you know you won't have to leave it for long. Your heart won't break as hard. Gauge how much you want to spend with the value of the bike, regular cheap chain and padlocks are useless.

LEAVING YOUR BIKE OUT THERE

Thieves need privacy, an easy target that won't take them a long time to get and won't attract attention. The worst possible place to lock a bike is with other bikes in those big public racks. Would you question anywone fiddling with a lock at a rack? Of course not, he's probably some guy having trouble with his lock, right? WRONG, he's breaking the lock and nobody will give him a second glance. He's done this many times and it won't be is last. Big public racks are like the bike section at Walmart for thieves. I've even seen a lady get her 3 speed roadster with a wicker basket get ripped off in one of these. You are better off locking it by itself elsewhere in plain sight for everybody to see. But be careful, don't use a tree, they cut them(Yes they do, seen it with my own eyes.) and if you use a pole, make sure it's solidely in place and not bolted. Some poles are sometimes loosened ahead of time by thieves just for that purpose. The best one I've seen yet was a rider who locked the bike on the library's flag pole, talk about being in plain sight!

THE TOOLS AND TACTICS OF THE BAD GUYS

Thieves use specialty tools for their dirty work. They use shortened bolt cutters that are easy to hide inside jackets, they use modified car jacks to pry U-Locks, they use some type of spray to freeze and then break the lock with a hammer. They also use your lack of attention, your laziness or wishfull thinking that nothing is going to happen while you're in the store for 2 minutes and your bike is left unlocked. In those cases, all they need is their bare hands. Remember, thieves are predators and predators always go for easy targets. That's on top of the fact that they not only stole your property, but they now have an instant getaway vehicle.

MAKE THEIR LIFE HELL

Having a good lock is not the only answer to bike theft prevention. Using it properly needs to be adressed as well. The space inside a U type lock needs to be packed with all the bike you can. This will prevent them from inserting the jack tool. Point the keyhole downwards, it is a lot harder to wack it with a hammer this way. Take off whatever is removable by hand, seats and wheels with quick release are just begging to be stolen. The worst I've seen was a brand new bike with an expensive lock. It was parked in a public rack at a train station. The U-Lock was passed in the rack and inside two spokes, of the front wheel, which was equiped with a quick release and still on the fork! When I came back, sure enough it was gone except for the front wheel. If the thieves had a decent wire cutter, they could have made off with the entire bike, minus two spokes that could have been replaced for a few dollars. They didn't bother, easy target. Another thing you can do is to sabotage your ride. The only drawback is that you have to remember to deactivate them before you ride off yourself. One way is to upshift all of your gears once you are stopped and locking up. There is a chance that the chain might break off when the bum makes his getaway and he might just leave it. The picture at the top of the post shows a well locked bike. It is locked on a pole that is cemented in the ground, it is in plain view, the seat was removed and the lock is pretty full.

Whatever you do, if someone absolutely wants to rip off your ride, they will. Just make sure that you do your part and take every possible precaution. Even though bike theft is not on top of the list of crimes for most Police Departments, take the time to register it and keep the registration paper in a safe place. You will know your bike's serial number and it will be easier to claim if it is ever found(It does happen sometimes). Another thing you should do, is to make a copy of that paper and insert it inside the handlebars, you can prove your ownership without question that way.

Here's a great video on bike theft prevention and how to know the enemy.

Until next time, ride safe and Godspeed

Gerry

Footnote

THE BLACK BIKE PROJECT

In June of 2004 I had a brilliant idea. A friend gave me a 3 speed roadster he had found in the trash knowing that I fixed up bikes and that I might use it for something.

I use to live in the western suburbs of Montreal and bringing a bike downtown was a pain. I painted the entire bike(except for the seat) flat black and made it rideable with whatever used parts I had. I brought it downtown and locked it up in plain sight on a busy street in front of a restaurant for future use, in a small city rack. I used a cheap U type lock that I had and made sure to fill it up.

2 weeks later it was still there and I managed to use it. I didn't go in the city for another 3 weeks after that. I was actually driving downtown for business and found the bike still there, but the seat was missing. By the end of August, I saw it again and this time the rear wheel was bent. At this point I figured I would leave it there just to see what would happen(I'm sure the restaurant owner wasn't too happy about that.).

The last time I saw it was in late september, the front wheel was gone(It wasn't locked with the rest of the bike), the frame was now bent, but the lock was still holding firm. The city workers finally chopped the lock off and tossed the bike at the end of October when they put away the bike racks. Just goes to show that a properly used lock, even a cheap one, can do a good job(I know the bike was trashed, but it was still there!).

Thursday, August 17, 2006

HOMEBUILT STREET LEGAL STREET LUGE WITH BRAKES


I know what you're saying:"What is this doing in a bicycle blog?". Well, what you are looking at, according to the province of Quebec Highway Safety Code, is a bicycle. Ok, let's start from the beginning.

Back in the late seventies, I was a skateboarder. I would find the biggest hill I could and bomb down that thing as fast as I could. I didn't do tricks or flips. I was a gravity junky. 10 years and some common sense later, I wasn't skateboarding anymore but I saw this street luge on TV andthought it was awsome. The main drawback is that it was missing something that I cherished after a few scary accidents, mainly brakes. I put the idea aside for a possible future maybe project...

...until 3 years ago. I don't remember if it came to me while on the can or in the shower but I was thinking to myself that if I built a street luge, not only should it have brakes, but it should be street legal to avoid any hassles from the law. Street luges are considered as skateboards here and a skateboard is illegal on public roads. But not bikes,hmmmmmmmm.

So I did what any good lawyer would do(No, I am not a lawyer)and I read the definition of a bicycle in the Highway Safety Code. It said something like this: A bicycle should have at least one brake, if there is only one brake it should be on the rear wheel. A bicycle must have a red reflector in the rear, a white in the front and yellow in the wheels. That's it, no mention if it should be 2, 3 or 4 wheels, gravity or pedal powered and no definition of the steering mechanism. My plan came to be.

I took a rear triangle from an old mountain bike equipped with brake pivots on the frame. I connected the triangle on a wood frame that I built myself from plywood and 2X4's. I slapped on a longboard truck in the front with a pair of rollerblade wheels. I bolted some handlebars to the sides to hold the brake handle and slapped on a high pressure slick on the rim of the rear wheel and tried my luck.

My friend Bob helped me put the whole thing together(He had the decent power tools and garage)and we tested the thing on a small hill to begin, his driveway. After all, even though I was pretty sure that it was going to work, I had no existing material to refer to, so small steps. IT WORKED! You would lean and it would steer, wow! So being all happy with our success, we parked the thing, bought some paint, slapped some reflectors as per the regulations, figured out where we would do our first run and I had to take care of one last detail.

I had to seal the deal on my legal twist. I went to my city hall and bought a bicycle license for the luge. I used the serial number on the donor bike's bottom bracket and registered it has a "Lauzon Cycle" Model"008". This being my eight build. I installed the plate on the luge and inserted the registration papers in my wallet. This would cover all the legal angles. Even if I was issued a ticket after informing the officer that it was in fact a bicycle with documents to prove it, a judge would toss the case out with a registration that was recorded prior to the infraction. This actually came in handy on one test run when the local constabulary questionned what "that" was and I produced the paperwork while pointing to the plate. "Have fun" was all he said while scratching is head before he left.

Our first run involved myself, my friend Bob and my son. We chose a nice easy hill with a bike path and we clocked 40 km/h. The luge was steady with no shakes. Actually, the faster it went, the more stable it was. We then took it to a freshly paved back road in the mountains and clocked 45km/h. At 3.5 inches from the ground that's starting to be pretty fast. I went nuts and decided to try it on the main road.

"Are you nuts!" was the phrase I heard from Bob. I said"No man, look there is a good 30 second delay between cars. You follow me with the van and everything will be cool." In retrospect, it was pretty stupid. But I guess my guardian angel was working overtime and the road conditons were pretty crappy anyway. No decent speed could be reached and I pulled off the road pretty quick to the relief of my best buddy.

During those first experiments, we found that the brakes were working good. Actually, too good! They would lock up the wheel fast and we would end up with no stopping power. My son left a 40 foot brake mark on the pavement and a huge flat spot on the tire trying to avoid ditching in a river, jamming the brakes immediately after a loss of control. We learned there that braking with your feet was not out of the question and the rear brakes could help us slow down at best. My son found the whole thing quite funny, I was happy he came out of it in one piece and waited at least 3 weeks before sharing the story with my wife. Kids need danger in their life or they'll always be afraid of everything.

With all this new knowledge, practice, gained courage, some old clothes, old shoes and a definite need for more speed, we headed for the killer hill. A 1/4 mile, 45 degree monster with a bike path right next to it that we could run on. I had my old airforce helmet rigged to work with a couple of talkabout radios, since the rider needed info from a spotter halfway for incoming traffic report. We managed to break the 60km/h barrier. That was my goal in the beginning of this project and we made it, all three of us. My son did 60.5km/h, I did 63km/h and Bob holds the record at 65km/h. We managed at least 5 runs each that day. I'm sure your not impressed with speeds that represent about 38 mph. But remember, this was done with gravity power alone, with a thing that was slapped together with a trash bike, some 2X4's and plywood in about an afternoon. At the end of that day we realized that we managed to push the enveloppe and survive with all of our parts intact. I was starting to get scared and so were my partners in crime.

We decided then and there to quit while we were ahead and avoid a possible guided tour of our local trauma center. The luge was retired and put away until it was time for me to move. Having no space in my new home to store it, I had stripped it of it's parts and put it on the curb. Funny thing, 1 hour later a kid passed by and saw it. I happened to be in the front yard at the time. He told me that he heard about this thing and since I was getting ride of it, could he have it. I told him how it worked, what parts to get, light a candle at his favorite church and point it down a hill. The kid was happy and left with the luge. I saw him 6 months later and he was still in one piece and having a blast with it.

BUILDING THE LUGE(Take note that this luge is NOT race legal)

WARNING! This thing is dangerous. If you build one and hurt or kill yourself, that's not my problem. I'll give you here the basic steps on how to build one. If you can't figured it out from these instructions, then you shouldn't be riding one, period. The luge was never taken on winding roads with curves, so I have no idea how it handles. It was always taken down straight hills. The brakes don't work that great. They slow you done or lock up, maybe disc brakes would work better, but I don't know that for a fact. Be prepared to brake with your feet. Wear leather gloves, old clothes and for God's sake wear a crash helmet. Never ride down hills with vehicle traffic, there's just no time to stop, trust me on that one.

You need some good thick plywood, some 2X3's or 2X4's, wood screws, a rear bike triangle, rear bike wheel with a slick tire, a longboard truck, soft longboard wheels(don't use rollerblade wheels like I did, bad, bad, bad), 9000lbs test wood glue, bike handlebars, two left aluminium crank arms, 2 rear wheel axles, nuts and bolts and 2 steel plates.

Cut up the bike to keep the rear triangle intact. You'll need a bike with a three piece bottom bracket. Leave the pedal axle in, you'll need that later. Construct the frame of the luge by using the 2X4's as your basic vertical frame. Sandwich your vertical frame with plywood by gluing then screwing it in with the wood screws. Drill two extra holes in the crank arms at the same spot. Bolt both of them on the pedal axle with both of them in the same position. Align them at the base of your wood frame at the back, drill holes through so you can bolt the crank arms to the wood frame with the axle rod and bolts. You will have to add sections of 2X4's between the cranks and the wood frame to fill the gap. Tightened everything as hard as you can. With some steel plates, nuts and bolts, sandwich the bike and wood frame together at the top.

Now you can put in the floor and backrest using the plywood. Put in the truck and wheels. One thing that you don't see on the photograph, that was added later for strenght, is another piece of 2X4 that was installed on top over the truck to make like a bridge. There is a gap in the frame underneath to install the longboard truck. Glue and screw that piece in. Install the brakes and handlebars.

If you're insane enough to build this and try it out, make sure you start small and where there is no traffic. Check every screw and bolt after each run. The vibrations will take this thing apart fast, I know this from personnal experience. Walk whatever hill you decide to go down of before hand so you can register obstacles and clean up debris. Don't do this alone or more than 20 minutes away from mediacl help. This Wyle E. Coyote contraption is just asking to hurt you. For those of you out there who are responsible enough to create and ride something like this, have fun and Godspeed.

Remember: When in doubt, OVERBUILD.

Gerry

Notice: In spite of my Red Green outfit in the picture above, no duct tape was used or harmed in the making of this project.

Monday, August 14, 2006

CHEAP AND INEXPENSIVE RECUMBENT: RENT, USED OR THE HOMEBUILT WAY


I have received some request about making a how-to article about building a recumbent. I intend to build one just for this blog, but it will take a little time and I have more general information to give out before I do this. This post is a primer to get you started and guide you in the right direction until that article is created. Here you have two pictures of recumbents I built myself. The one with the flame job is the first one and the two others are my last builds. Four more recumbents where built between those and I actually bought a manufactured one. I might not be a recumbent guru, but I know what I'm talking about. So let's get started.

Many of you are caressing the dream of owning a recumbent, but you wonder if it is worth the extra expense. Your first step is to get all the information you can on the subject. Get educated on terms and what a recumbent is all about. The very first search I did when I first got connected on the web was "recumbent bicycle" and it went crazy from there. At last I had access to all the information I could possibly want on the subject. A lot more than a few scenes in the movie "Scanners".

The one thing that struck me was the variety present out there. Long Wheel Base(LWB), Short Wheel Base(SWB), Over Seat Steering(OSS), Under Seat Steering(USS), Front Wheel Drive(FWD), streamliners, trikes and all other kinds of craziness in between. Everyday there is a company or a homebuilder who adds to this wild variety of bikes.

Recumbents have the advantage of a more powerful pedal stroke and a more comfortable seating position. The seating position utilizes more muscles in the legs. It is the same power you have from pushing something with your legs while sitting with your back against a wall. As for the seating position, well you are sitting down on a chair, you can't get more comfortable than that! Well actually, you can. One disadvantage of sitting down in a chair is that you can't get up to avoid the hits from bumps and holes in the road and you can't get up on the pedals to use your upper body strenght to climb hills.

Two solutions for these drawbacks: 1-Rear suspension will take care of most bumps and make for an even more comfortable ride. 2- Lots of gears and more mileage in the recumbent position will developp those dormant muscles in your legs and with time, hills won't be that much harder. Bottom line is that recumbents are better for long rides since you won't kill your butt, hands and neck during the ride. My biggest kick about riding a recumbent is to lean down at 45 degrees on a hard and fast turn while sitting down in that comfy chair/seat. What a blast, it feels like riding a fighter jet at 10 inches off the ground. Trust me, it's just awsome.

To get on a recumbent on the cheap is not easy. You have a few options.

  1. Get on the net, get out your tools and build one. There are all kinds of homebuilt recumbents on the net. From wood framed bents made from 2X4's, to no-weld construction and full carbon composites. You don't know how to weld, no big deal. Prepare your pieces and hire a welder. This the 21st century dude, outsource it!
  2. Rent it, there are some bike shops out there who offer recumbents for rent. If you are lucky enough to have access to such a place, use the opportunity to try out different kinds to find out what you like best.
  3. Buy used, some people out there have bought the wrong bike for them and are desperately trying to get rid of them. These bikes are not for everybody and finding a buyer is sometimes hard. There are also people who end up in possession of a recumbent without knowing their true value. It's rare, but it happens. Go hunting for your lucky break.
I've used option 1 and 3 myself. I used option 3 once and the result was a dud. It was a LWB USS job with 20 and 16 inch wheels with 105 speeds(See how you get to use that new knowledge you acquired in paragraph 3 right away!), it was extremely comfortable but very slow. Option 1 I have used 7 times so far and had a lot of fun doing it. The main thing that you have to ALWAYS remember when building a recumbent or HPV yourself is that when in doubt, OVERBUILD. You cannot cut corners and half-ass it without expecting a major break down at the worst possible time.

Now if you are ready, it's time to explore. I'm leaving you with some links that will get you started. Recumbent and HPV people are very friendly and eager to share there knowledge. Ask questions if you don't find the answers you are seeking, join discussion forums and get your hands dirty! Warning, homebuilding HPV's is addictive, that's it you've been warned. It's now out of my hands.

Check out these sites for a good start:

Sunday, August 13, 2006

HOW TO START YOUR OWN BICYCLE REPAIR BUSINESS


IN THE BEGINNING
Bikes have been around for over a hundred years. More bikes are produced in the world every year than cars. A bike makes you 21 times more efficient covering a mile than on foot. A bike is cheap to maintain and operate. Unlike an automobile, you own it, it doesn't own you. Depending on where you live on this earth and your income a bike is either a toy, a recreation device, a transportation vehicle or a tool. With the recent price hike in fuel, bikes are not about to vanish from the transportation map.

All this means is that there will always be a need for people to repair them. Bicycle repair is simple and doesn't require heavy tools, machinery or a large working space. It does however require knowledge, a few specialized tools and a passion for biking. This article is long and you might want to refer to it again. Feel free to bookmark it for later consultation or print a hard copy.

GATHER INTELLIGENCE
Before you start, you need to get solid information. If your lucky enough to have access to a local trade school or community program that will teach you to be a bike mechanic, great! Jump in with both feet, watch and learn. If not, the other way is to teach yourself. First thing you have to do is to get a good technical manual on the subject. I mean a bonifide real hardcopy that you can leave on your workbench for quick reference. Spend the money, in the long run you will see that it's a wise investment. You can read how to fix bikes on the web, but nothing beats a good solid manual that is divided in easy to look up chapters. Even this blog is not complete enough to learn to become a mechanic, I've yet to start on 1/4 of the material that's needed.

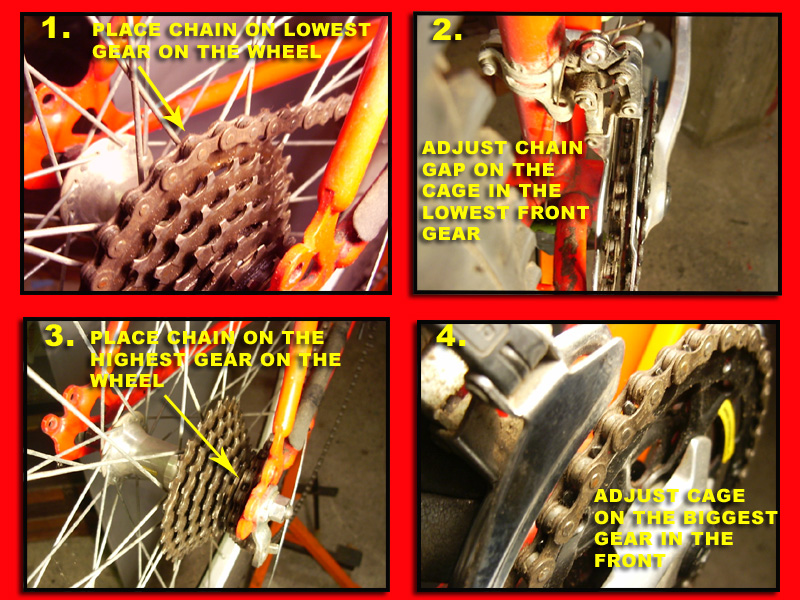
Learn to build wheels. No bike mechanic is truly a real bike mechanic without this skill in my opinion. You have to learn this from someone who will sit down with you and explain the process. There are also some great tutorials about wheel building on the web. I had the chance to have both and thru the years I have managed to become a decent wheel builder. Noting is more relaxing for me than to sit down and lace up a new wheel. This is the ultimate craft that you MUST learn. After building a few wheels, aligning them will become very easy.

Lastly, keep informed on the new trends by reading bike magazines on a regular basis. I need to brush up on this myself.

TOOLS OF THE TRADE
You'll need some basic tools like metric size open wrenches, tire spoons, chain breaker tool, a good tire pump with pressure gauge, spoke wrench, a complete set of allen keys, screwdrivers, ratchet set with size 9 to 17mm, wire cutters, adjustable pliers, flat bearing cone wrenches, crank arm pulley tool, a work stand and a trueing stand for wheels. I'm probably missing some stuff, but as you go along in your jedi bike mechanic quest, you'll learn to buy what you need. This list is a good start.

PRACTICE PRACTICE PRACTICE
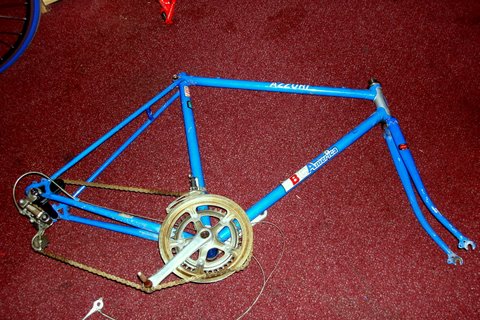
Now before you go out in the world helping people out by fixing their bikes, there is one thing that every newbie mechanic must do: Take your own bicycle apart to the bare frame, regrease every single bearing in it and put it back together. I don't mean just taking off the wheels and putting them back on. I mean to the bare frame, totally naked with just the paint and stickers. If you can do that and safely ride your bike again after you've rebuilt it, you'll know if you have the ability or not. It won't mean that your good yet, but that you do know what you're doing.

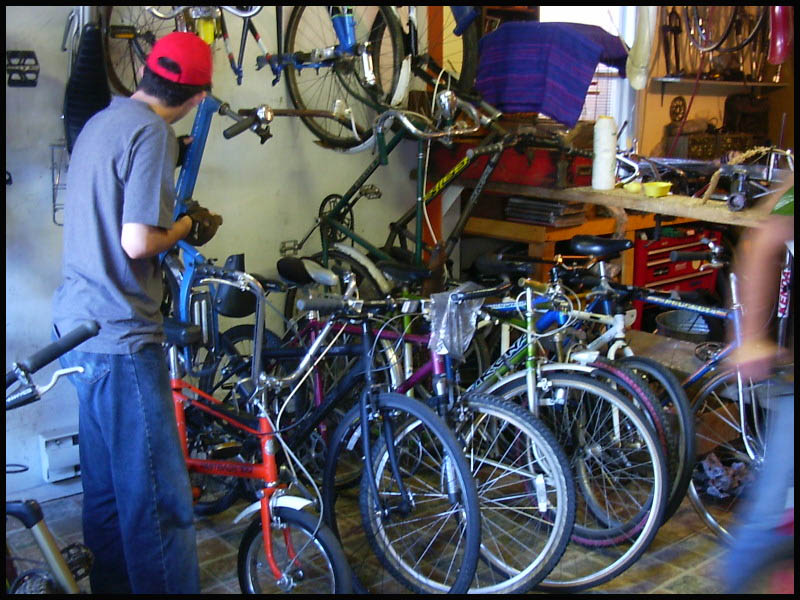
Next thing you'll have to do is to find some donor bikes for parts. Anything is good when salvaging for parts. Many bearings, cranks, brake calipers and chains, to name a few, are common to many kinds of bikes. Never overlook a carcass that you can get your hands on for free, you can always use something on it. Taking apart these donor bikes will do two things for you: You will learn how different types of bikes are put together and you will make yourself a decent supply of spare parts. Don't kid yourself, you probably won't be working on the very latest ride that came out of that fancy bike boutique 2 months ago. Chances are you'll be working on bikes that are pretty similar to the ones you are taking apart, mainly chain store specials. Besides, customers love buying used parts since they pay less and you love selling them because they cost you next to nothing.

WORK ETHICS
When taking a bike in for repair, ask the owner what he/she thinks is wrong with it. Listen in carefully for some clues that might help you out on the repair. Check the bike for loose wheel bearings, bad brakes, out of adjustement shifters, frayed cables, loose pedal axle bearings in front of the customer. Tell him/her what you have observed and your evaluation of the bike. If you suspect that there is a possibility of a major problem, tell the customer right away. People appreciate when they know what they are getting into ahead of time and they hate surprises. They'll also appreciate that you took the time to listen to them. If you get a surprise while doing the job, stop the work, call them up and explain it to them. Give an estimate and ask the customer if the work should go ahead.

When you know you have to replace parts, offer a used part if you have a good one in stock. My gauge is half price from new or less. I also throw in used parts for free sometimes. Everybody loves free stuff. When I have to supply a new part, I will usually charge the same price I paid for it since I buy it retail.

When you fix another persons bicycle, they depend on you for their safety. Anything can happen to them if you've missed or forgotten something. Always, and I mean ALWAYS, take the bike out for a test ride yourself before giving it back to it's owner. One loose bolt or badly adjusted brake cable could represent major injuries or death, REMEMBER THAT.

Keep track of your customers and call them up after a week, or if you see them, and ask if their bike is running good. Should you get a negative answer while the bike and customer is in front of you, make sure you always carry basic tools so you can take care of the problem on the spot. If not, always garanty your work and fix the problem for free as soon as you can. Returning customers is what you are looking for, treat them well. Working on a bike from a return customer is very easy most of the time since you know who was the last mechanic that worked on it.


MARKETING YOUR NEW SKILLS
You should start marketing yourself as soon as possible. Talk to friends and family about your talents even while you are learning them. Offer them to work on their bikes for free, it will give you practice and the quality of your work will be spoken to others. People love to brag about good products or services. If you do great work, your friends and family will not hesitate to give you referrals to potential customers.

Volunteer your time. Don't hesitate to give your time to good causes like bike safety rodeos. Community groups are always in need of mechanics when doing events like these, they'll be more than happy to take your offer and they won't mind you giving away your business card in exchange for your services. You will meet a lot of potential customers and they will get to sample your work. They will ask you questions and ask your opinion on many bike related subjects. Don't be afraid to interact with them and be friendly. This is an opportunity to make contacts and build your reputation.

Advertise on your car(if you have one), on bulletin boards, on local free internet classifieds and on your bike. Be aware that if you chose to advertise on your bike, be sure that it is in perfect running order and that it looks good. Even if you don't have a fancy bike, it still as to be clean and look the part of a well oiled machine. I don't advertise on my bike because it looks like crap! But it runs perfectly and I like the fact that it looks crappy. That's just the way I am.

Get people to know you as more than just a bike mechanic, but a bike guru. Give information on bike related topics like safe riding, cycling health benefits and your own cycling preferences. Remember, this is your passion and you want to share it.

PRICING
Since people are reading this from all over the world, it is hard for me the give an actual price for every single job. One thing I can tell you is that I charge a flat fee for a tune up, plus the cost of parts. Here is my definition of a tune up: The bike comes in running like crap and the bikes goes out running fine. Period, whatever it takes for the bike to run good. Some bikes take me 2 hours and some 20 minutes. I only replace or fix what needs to be fixed because I check everything. In the long run, the average makes it worthwhile and the customers are happy. When customers are happy, they come back and chances are you might have to do less work on that same bike when it goes back in your stand.

Of course I will not charge the same fee if all the customer wants is to replace a brake cable or if he/she wants to strip and rebuild the entire bike.

Don't be greedy and sometimes throw in a freebie, it will always come back to you in a positive way at some point. Giving feels great and I consider myself a millionnaire for the many times I had the joy to see a kids face light up after giving him/her a free bike.

HOME BICYCLE REPAIR OR OPENING A SHOP?
That's a big decision. If you are fortunate enough to live where riding is possible 12 months a year it is much easier to do than in a place like where I am with real cycling business happening only 3 months a year. Working from home to start is always good. You get to build a customer base and that is priceless when starting a new business. Beyond that I can't really help you. I've always been asked why I didn't open a bike shop and my answer has and always will be: I like biking too much. With only 3 nice months to ride here, I don't want to spend them with my elbows in grease in a neon lighted little shop. I prefer doing jobs once and awhile now and I get to choose my customers. I've moved recently and lost all of my customers and realised that I wasn't riding that much anymore. So now I'm more picky about my customers and I only do jobs when I feel like it. If you want help on opening your own shop, check out your local chamber of commerce or of course there is always the web. I gave you the basics for a bike repair business, but I won't get into how to get hooked up with bike manufacturers and parts suppliers. I never did that so I'm not qualified to give you that information. But if you want it bad enough, I'm sure you will find it.

If you decide to get into bicycle repair, either at home or opening a shop, remember this: Everybody offers the same thing at about the same price. People know they have to pay for your services and they are willing to do so. What they are looking for is SERVICE. That is the key in my opinion, great friendly service will always get you more customers.

LAST WORDS
Rule number #1, have fun. If you enjoy what you are doing, you will be a good mechanic, work will always find you and you will keep your passion alive. If you ever decide to start in the bike repair field, email me and let me know how this little article helped you out. I'm also willing to answer any questions. This post will most probably be revised from time to time.

Until then, ride safe and Godspeed.

Gerry