OUR ADVERTISERS

Showing posts with label "wheel repair". Show all posts

Thursday, October 23, 2008

THE LAZY AND EASY WAY TO BUILD A BICYCLE WHEEL.


First off, this technique is only good if you need to replace a rim. Also, it will only work of you are replacing the rim on your wheel with the same diameter rim. You won't be able to put a 26 inch rim on an old spoke and hub set up for a 700 bicycle wheel.

Now that we got that out of the way, on with the show.

For the benefit of this post, I will switch rims from alloy to steel for a cruiser project. What you need is your bicycle wheel, a replacement rim of the same diameter, spoke key wrench and some masking tape. Make sure that you are replacing your rim with a straight one. A bent rim will only provide you with more reasons to curse. You can easily check this by laying the rim on a flat surface and any bends will magically be revealed.

Next, take the new rim and tape it to the old one. Now you must match the two rims together. This means that the valve holes must be aligned with each other and the sides of the spokes as well, ie a left spoke hole matches a left spoke and a right spoke hole matches a right spoke, etc...


Now start removing the spokes from the old rim and transfer them to the new rim one at a time. Don't screw the spoke nipples tight on the new rim, we just need them to hold in place.


Once all the spokes have been transferred to the new rim, remove the tape and the old rim. Voila! You have just built a new bicycle wheel the lazy and easy way.


Take your newly rebuilt bicycle wheel and screw all the brass nipples until you can't see the thread on the spokes. If you know how to true a bike wheel, now is the time to put it in the stand and true it. Tension will be put in the wheel after this initial truing and you'll top it off with a final true after that. For those of you who can't, you can go to my article with a video on the subject listed at the bottom or you can bring in your wheel to your local bike shop for final truing. Hopefully you will save some bucks since they didn't have to build it for you.

How-to true a bicycle wheel video link

Until next time, ride safe and Godspeed.

Gerry :)

Monday, August 06, 2007

HOW TO ALIGN OR TRUE A BICYCLE WHEEL

Well it's been a long time coming, but here it is. I have attached a video to this article. It's not great, but it will have to do for now until I figure out a better studio set-up.

Truing a wheel is not that complicated. The rim is attached to the hub with the use of spokes. The spokes are divided equally on each side of the rim and are held there by brass nipples that can be screwed or unscrewed. A brass nipple is basically an upside down screw, so you have to go counter clockwise to tighten it and clockwise to untighten. Tightening a brass nipple will make a spoke "pull" the rim to the outside and the reverse will "push" it inside.

This means that if the rim is too much to the left from the center and this happens in front of a spoke located on the right side of the rim, you would have to go counter clockwise so that the spoke will "pull" the rim back to the right. If the same situation would occur in front of a spoke located on the left side of the rim, you would go clockwise to unscrew the nipple and that would "push" the rim to the right.

The main thing to remember is to go at it one spoke at a time. If you try to straighten the wheel by adjusting 6 spokes in one shot, you will have problems. Also, if you have to make more than one turn on a brass nipple, make half as many turns on the 2 nipples on each side of it to avoid creating a flat spot in the rim. When you are close to finishing the job and the adjustments are minute, you don't have to do this.

If you want to try this, get a truing stand, find some busted wheels and practice, practice, practice. Remember though, not every taco wheel can be saved. Sometimes it's better to start with a fresh rim.

Til next time, ride safe and Godspeed.

Gerry


Saturday, March 03, 2007

EMERGENCY WHEEL FIX


Pop quiz, you're riding down the road minding your own business when all of a sudden you crash and seriously bend a wheel on your faithful ride to the point that it looks like a taco. What do you do? Let's say that you have no tools, you're miles away from home, there is not a bike shop anywhere in site and no way to get a lift home. Supposing that you have survived the incident intact and you don't require ambulance transport, you're on foot and you need to get back home.

At this point, you have nothing to lose and everything to gain. Your wheel is busted and you'll have to replace it anyway. You can work the wheel roughly back into shape by putting it on a hard surface, place your feet on the raised side of the "taco" and with both feet, jump firmly on the wheel to press it down. It should come back into a rideable shape. Do some more spot presses if you have to. The idea of this maneuver is not to have a perfect wheel, you'll have to replace it anyways, but to bring it back to a decent shape so you can ride back home slowly. At this point, the wheel will do it's job, but it won't be balanced and safe. So avoid any serious speed, especially downhill.

Let's face it, the worst ride beats the best walk! In the images, I used a wheel without a tire. Wheels with a tire usually come back in pretty good shape if I refer to the few times that I actually had to do this. Don't kid yourselves after this, the rim and spokes are shot, so go to your local bike shop and get another wheel once you get home safely.

Til next time, ride safe and Godspeed.

Gerry

HOW TO REMOVE A BICYCLE WHEEL


This blog has covered a lot of fancy things like taking apart a bottom bracket, adjusting various components and building trailers. But I just recently realised that one of the basic things was never covered, like how to remove a bicycle wheel. For people like me who fix bikes it's pretty darn obvious, but I realise that for some of you it's not.

So let's get cracking! Removing a wheel is easy once you know a few things. The front wheel is the easiest to remove. Simply unbolt the nuts, pull the washers and you are done. The only thing to remember is to remove a brake pad to clear wide tires. Just one should suffice, it will avoid you the trouble of disconnecting the caliper and having to reajust it afterwards. Ajusting just one pad is much simpler. When you put the wheel back on, it is much better to have the bike and wheel sitting on the ground. This way you will be certain that the axle is sitting even in the fork and the wheel won't be crooked. Another way to find out if your wheel is on straight is to look and see if the center thread of the tire is aligned with the caliper hole in the fork.

The rear wheel is another story. Depending on what type of bike you have, there are some things you have to know before removing the wheel. Let's check it out one type at a time.

  • One speed coaster brake First thing to do is to remove the bolt that holds the brake arm to the bracket on the frame. Then untighten the wheel nuts, wiggle the wheel to slacken the chain and remove the wheel. When putting the wheel back on, make sure the brake arm is aligned with the bracket and put the chain back on the gear before.
  • 3 speed or more internal gears Disconnect the cable to the hub mechanism before you do anything. Do the same thing as the coaster hub wheel to remove and reinstall it.
  • Multi speed derailleur Make sure that the chain sits on the last gear closest to the frame. Unbolt the wheel and push it forward while pulling on the derailleur cage. The wheel should slide right off. When reinstalling it, put the chain on the last gear again, pull the derailleur cage and slide the wheel back in place.
When putting the wheel back on in all 3 cases, start by bolting the right nut(The one on the side of the chain) as you make sure you have proper chain tension for coaster and inner speed hubs and that the axle sits at the very bottom of the drop out hole for derailleurs. Once that nut is tight, grab the wheel near the pedal axle and align it straight with the bike frame. While you're holding the wheel in place, tighten the left nut.

That's it, you're done.

Til next time, ride safe and Godspeed.

Gerry

Tuesday, August 01, 2006

How to grease bicycle wheel bearings


You asked for it, here you have it. Wheel bearings on a bicycle are an important part of bicycle maintenance and by making sure that everything is well lubed in there, you can avoid costly bicycle repair down the road. Well lubed bearings also provide an easier ride.

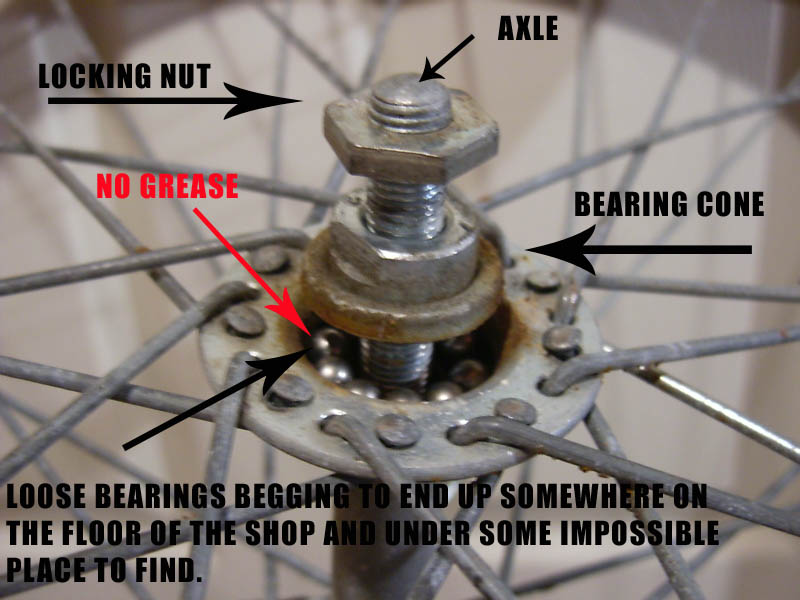
The wheel bearings sit between a cone screwed to the wheel axle and the cup in the wheel hub. They must be properly adjusted and greased. To find out if everything is ok without taking everything apart, simply remove the wheel from the bike and turn the axle with your fingers. Everything turns nice and smooth without any play? Good, then you probably don't have to worry about anything. If the axle is stuck, very hard to turn or is very loose, you have to regrease your bearings propbably anyways. Here's how to:

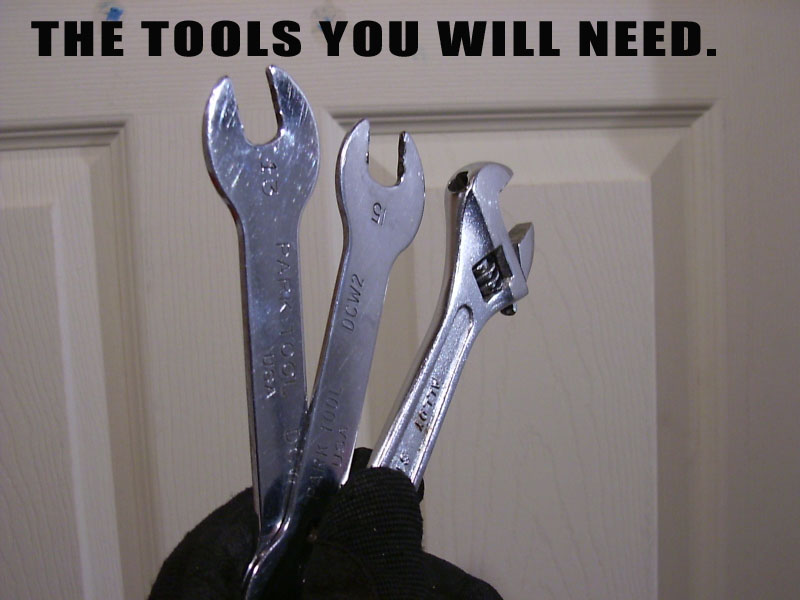
1. You must get yourself some flat open wrenches, Park Tools makes good ones, make sure they are in sizes 13mm and 15mm. Those are the most common sizes. You won't get away using anything else for the bearing cones, so don't even try. Any kind of adjustable wrench will do for the locking nut.

2. Put the flat wrench on the bearing cone between the hub and the locking nut. Put the adjustable wrench on the locking nut. Hold the bearing cone in place and unscrew the locking nut. The best position to do this is hunched over the wheel while it sits on the ground. Whatever you do, DON'T open the cones at all while in this position. Just unlock it so you can unscrew everything with your fingers later.

3.This is later. Bicycle wheel bearings come nicely snug into crowns these days, but sometimes you still find some that are just put loose in the wheel hub. To avoid all of them crashing to the ground with the possibility of vanishing for ever, grab the axle on the side that is still locked in place and point the end that you've just loosened, up. Now it is time to unscrew the locking nut almost completely off the axle. Next, unscrew the bearing cone to expose the wheel bearings to the light of day. Any grease in there? You'd be surprised on how often I open up brand new bikes and find almost nothing.

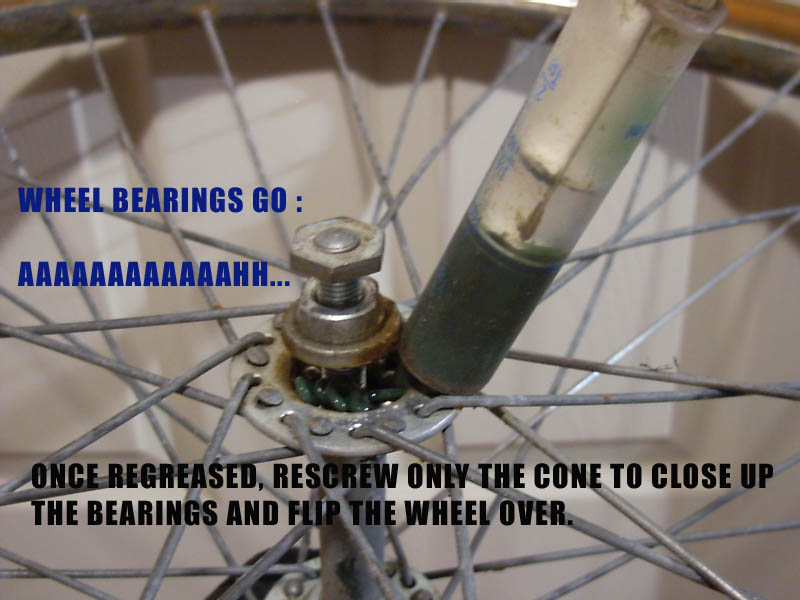
4. Now this is the fast way to regrease your bearings by just shooting grease in the bearings, screwing the cone back in, flipping the wheel over, hold the cone of the bearing you've just greased, grab the axle now facing up, unscrew it to reveal the other side bearings and pack them with grease. But the proper way is by taking everything off, clean all the cones, hub cups, bearings, repack with grease and reassemble. One great way to pack grease in wheel axles is by using a small feeder syringe. Only undo one side of the axle, this way you are sure that your axle is always centered when you reassemble it.

5. Reassembly is done screwing in the bearing cone back into place, but not too tight. Bearings should be able to roll smoothly without axle play. Tightened the lock nut into place and check again. If you ever hear crunching noises while turning the axle, dirt has gotten into your bearings and you should start all over again. To avoid this, make sure you work in a clean place. If everything is clean, you might have small pits in your bearing cones or cup. Your bearings will be eaten away with time and it would be a good thing to replace those.

Special note on rear wheel bearings.

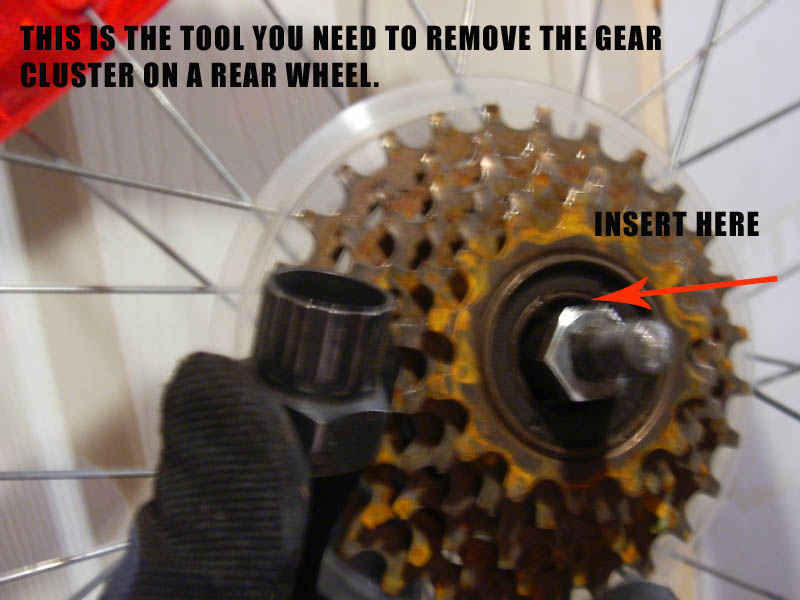
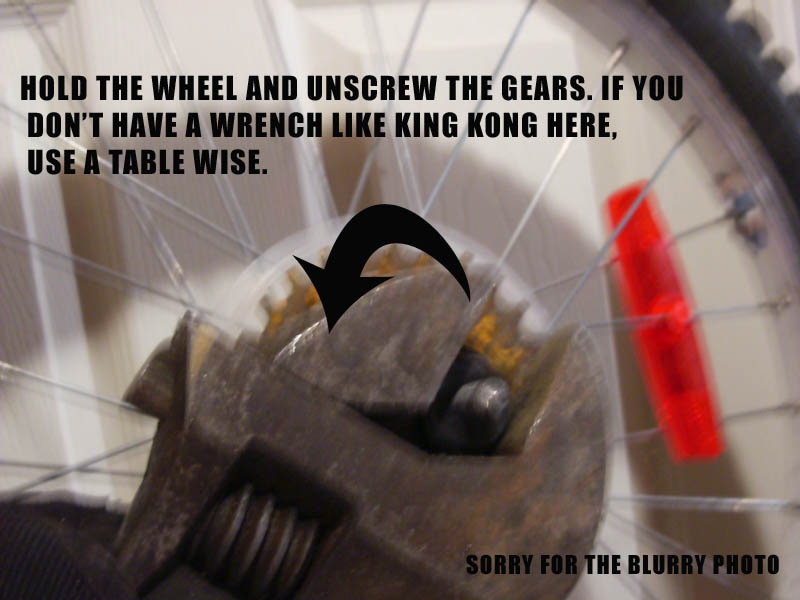
In order to repack rear wheels, you have to remove the gear cogs on them. In order to do this, you need a special socket to unscrew it. Check with your local bike shop for the proper one. Their are a few models and types. Coaster brake or inner speed hubs are almost bullet proof and very rarely need regreasing. Those should be handled by a pro.

Tip of the day: My favorite grease recipe is a 50/50 mix of green axle grease and any type of white teflon based bicycle grease. The teflon grease is very good but isn't very thick and tends to liquify easily. The green axle grease adds muscle to it. Try it.